Showing posts with label digital preservation. Show all posts

Tuesday, July 12, 2016

How I Joined My Local Historical Society

Until coming to Dartmouth, I'd pretty much always lived in large cities. The politics and agencies that made these cities function were somewhat of a mystery to me - I knew work was done by people somewhere, but the processes and responsible agents felt distant and mysterious.

Strafford's Iconic Town House
Living in small town Vermont is a totally different scene. The business and services of our town, Strafford VT, population ~1000, is run by people I see at the general store, who work at the local school, who live down the street. My friends are on the Volunteer Fire Department, my husband attends meetings of the Conservation Committee, my neighbor is on the School Board.

After we settled in to town, I wanted to get involved, too. Given my experience in preservation departments big and small, the Strafford Historical Society seemed a natural fit. This past January, I emailed the chairman of the Historical Society Board, explaining my educational and professional background in preservation, as well as my current work with digital projects and digital preservation. The response was immediate and enthusiastic: "OH MY GOD WHEN CAN WE MEET WITH YOU THIS IS EXACTLY WHAT WE NEED YOU ARE AN ANSWER TO OUR PRAYERS" (I've paraphrased).

The Brick Store- Home of the Historical Society
It turns out, the Strafford Historical Society has long felt a need for a more developed web presence, and has dreamed of putting their collections online. Can you, they asked, build us a website, digitize our collections and make them searchable for the world on a very small (non-existant) budget? Having never built a website, and knowing how much work, infrastructure and expertise goes into creating digital collections, I said, "Sure! But it might take us a while."

Over the past few months, we've had a few meetings of the ad hoc Technology Committee of the Strafford Historical Society. We've identified people in town with programming and systems admin skills that can help us set up an Omeka instance. People have volunteered time for "data entry" (i.e. metadata creation) so they can learn more about the collections. We even got a donation of a scanner from a generous Board member.

Building out a digital presence from scratch with few budgetary or infrastructure resources could seem daunting and overwhelming, but I'm feeling pretty optimistic we can do this thing. The past two years have shown me that this town is full of talented people willing to contribute time, willing to share knowledge and expertise, and willing to learn new skills to serve the good of the town. We've totally got this.

Written by Jenny Mullins

Tuesday, May 17, 2016

Image Resolution and You

Picking your resolution is perhaps the most important decision you'll make when digitizing photos, artwork, or any other kind of image. But it can also be confusing if you're not familiar with these terms and their meanings. This is a simple primer to help you choose the right resolution for your needs.

The terms DPI and PPI are both shorthand units for measuring an image's resolution. DPI stands for "dots per inch" and PPI, "pixels per inch." This means that DPI is technically a term for a printed object's resolution while PPI describes an image displayed on a screen, but in common use they are essentially interchangeable.

The system that these measurements describe is called Raster, and it's by far the most common in a modern digital setting. A raster image is essentially a mosaic, collecting dots of color called pixels in a tiny square grid to produce an overall image. The more pixels per inch, the more detailed the image. Simple enough, right? For an easy example, here is the same image at three different standard resolutions: 600dpi, 300dpi, and 72dpi (click to see at full size)


You can always lower the resolution of an image, but it's impossible to raise it, except in a simple multiplying sense. This is why all digital images look blurry if you zoom in far enough. You're making the pixels bigger, but you aren't adding any new information to them.

Another factor you will want to consider is your display resolution. Modern high-definition TVs will often give you this basic measurement, and while computers have a greater variety of resolutions they will generally fall under a few typical values. 480p means a screen is 480 pixels wide, and is considered "standard" definition. 720p is, of course, 720 pixels wide, and marks the beginning of "HD" standards. 1080p is probably the most commonly used HD resolution, and the cutting-edge "4K" resolution is a convenient shorthand for screens 3,840 pixels wide. The screen resolution will determine how "large any given image looks at full-resolution on the screen. If you try to stretch a 480p wide image across 1080 pixels, it will look bad.

While the ideas surrounding pixel resolution, display resolution, and print resolution are quite complicated, they can still be understood easily with a few guidelines. For most purposes you can create images using 3 different resolutions:

600ppi is what we at the Dartmouth Digital Library Program use as the standard for high quality "master" images. Although many scanners can go higher, the size of the file becomes very unwieldy at that point. My advice is to always start at at least 600. Better to have a high-quality image and not need it than to need it and not have it.

300ppi is a common resolution for a high-quality print. Unlike looking at a screen where the resolution can be shrunk or blown up, a printer is rigidly limited in the amount of detail it can put into any given area. While a particularly good printer may get higher resolutions, most will clock in around 300dpi. This lower resolution also makes transferring files for print easier. And of course, it's always useful to keep your higher-res files around in case you need to go back to them.

72ppi has become the most common display resolution on the internet. There are a few things to consider before simply converting your image into 72ppi. Look at your display, and understand what its resolution is. Then consider how "big" you want your image to look on the display. So, if you have a 1080p monitor and want an image that fills the whole screen, you'll want to change your ppi to 72, AND change your image width to 1080p at the same time, with the proportions locked.

Here we can see Photoshop's image size menu (Image -> Image Size), where the pixel width and resolution are changed while the proportions remain constrained.

This is often a confusing concept to grasp. The simplest way I can think of is: if you reduce a 300ppi image to 150ppi, but also double its size, it will essentially be the same image when you see it on your computer. But if you try to print that, it will be half as detailed by virtue of being twice as big.

Fortunately, you don't need to fully understand all of this in order to create and work with high-quality images. As long as you make sure your highest-quality 600ppi master versions are safely backed up, you can play around with these variables in Photoshop or any other imaging program until you meet your own needs. Understanding how screen resolution, print resolution, and image resolution work together is an ongoing process that changes with technology as well as peoples' needs. It's important to be consistent, especially so for an institution like ours, but it's equally important to know how to adapt to your own needs.

Written by Ryland Ianelli

Tuesday, April 19, 2016

Preservation Week Webinars

Preservation Week is an annual celebration hosted by the American Libraries Association, Association for Library Collections & Technical Services, Preservation and Reformatting Section. This year there are two free webinars that may be of interest to the public as well as preservation professionals:

From Cassette to Cloud: Reformatting Audiotape
Tuesday, April 26, 2016
Webinar begins at 2pm Eastern, 1 pm Central, noon Mountain, and 11 am Pacific
Krista White, Digital Humanities Librarian, Rutgers University-Newark
Oral histories can provide a wealth of information about individual and community life. This
webinar explores ways these recordings can be digitized, and the challenges in doing so.

For additional information and access to the free registration links, please go to the following website: http://www.ala.org/alcts/confevents/upcoming/webinar/042616

Preserving Your Digital Life
Thursday, April 28, 2016
Webinar begins at 2pm Eastern, 1 pm Central, noon Mountain, and 11 am Pacific
Krista White, Digital Humanities Librarian, Rutgers University-Newark
Many of us record and keep personal and family stories in digital formats. This webinar explores steps to take now to for preserving these narratives for future generations. means considering how we create the files and how we store them. What steps can we take now to make the ensure the best possibility of retaining these important files into the future?

For additional information and access to free registration links, please go to the following website: http://www.ala.org/alcts/confevents/upcoming/webinar/042816

These webinars are primarily intended or individuals, but will also be of interest to local historical societies and other cultural heritage groups.

ALCTS webinars are recorded and registrants receive a link to the recording shortly following the live event.

Thanks to ALCTS Continuing Education Committee for providing this information.

For more information about Preservation Week go to: http://www.ala.org/alcts/preservationweek

Tuesday, January 26, 2016

Dartmouth Library Hosts New England Code4Lib Regional Meeting


Early last December, library and technology enthusiasts from the far corners of New England gathered in the Jones Media Center here at Dartmouth College Library for the NE Code4Lib 2015 Fall Meeting.

Thanks to the awesome NDSR-Boston cohort, a lot of digital preservation ground was covered- including getting started with digital preservation, building a digital preservation community, and processing born-digital archival materials.
I gave a short talk about a script I use to QC and package digital materials for ingest into our repository.

You can see slides for these talks, and all of the great presentations from the meeting, on the NECode4lib 2015 Fall wiki page. Also, be sure to check out the Storify for the day put together by Joe Monibello.

The Book Arts Workshop also played a role in the event. My colleague Shaun Akhtar and I made use of the resources, expertise and equipment of the Book Arts Workshop to print custom letterpress give-away posters for the Meeting. It was a really fun way to tie together all of the technological expertise that resides here in the Library!

Written by Jenny Mullins

Tuesday, July 21, 2015

The ABCs of Digital Preservation

April 27 through May 1 of this year marked the American Library Association's 5th Annual Preservation Week. To celebrate, I gave a talk for library staff titled The ABC's of Digital Preservation. The purpose of the talk was to introduce some basic digital preservation concepts, such as choosing file formats, file naming best practices, and the basics of preservation metadata. I also discussed some tools and models for managing digital materials, and tried to demystify some of the acronyms I throw around casually in meetings ("If we follow OAIS, the SIP could contain a TIF and some PREMIS and or METS, and of course the AIP will need an md5...").  You can view the slides of the talk here. 

The talk was well attended, and I got a lot of good feedback and follow-up questions. In this blog post, I'd like to address these questions, and talk about some resources to learn more about topics discussed in my presentation.

First, I'll start with some general resources...

In creating and organizing my presentation, I was inspired by the North Carolina Department of Cultural Resource's Digital Preservation Best Practices and Guidelines. It's a great resource and an excellent starting point.

Read through the archives and follow The Signal, the digital preservation blog of the Library of Congress. They highlight a lot of amazing projects covering all aspects of digital preservation.

Also, the North East Document Conservation Center has some great resources.

Now, on to your questions...

1. Is there a list of file formats defining their function that I could reference?

Yes! The Library of Congress developed this great resource for file format descriptions. The South Carolina Department of Archives and History also has a nice resource on File Formats.

2. Could you point me toward a bibliography of good guides for organizing photographs (or perhaps a workshop)?

Library of Congress's Personal Digital Archiving project has a good, succinct guide to archiving digital photos. Here's another great resource created by MLIS students at Catholic University of America for Preservation Week. Mike Ashenfelder also wrote a great blog post on The Signal answering questions about digital photo archiving (you should check out the webinar he references as well!) And finally, here is an amazing resource for digging into embedding metadata in digital images.

3. Can you tell me more about the Digital POWRR Tool Grid?

"The POWRR Tool Grid v2 provides a set of interactive views designed to help practitioners identify and select tools that they need to solve digital preservation challenges. This Grid is based on the Tool Grid first developed by the Digital POWRR Project, and combines the form and function of the original POWRR grid with the far greater coverage of tools provided by the COPTR data feed."

4. What are the current archival standard for image scans- resolution and bit depth?

The Federal Agencies Digitization Guidelines Initiative (FADGI!) has an excellent document that goes into great detail providing best practices for image scans:  Technical Guidelines for Digitizing Cultural Heritage Materials .  ALTCS, a division of ALA, has also published a helpful guide for Minimum Digitization Capture Recommendations for many types of media.

5. What are the best practices for preserving video files (ideal formats, codecs, etc.)?

Choosing a file format and codec for video preservation master files is complex. A lot depends on available resources, technological expertise, and the context in which files are created and managed. FADGI has done an excellent analysis of the issues involved in their report Digital File Formats for Digital Tape Reformatting. For best practice guidelines for creation and management of digital video, I really love the Activist's Guide to Archiving Video.

6. Bagit …. wait, what?
Check out this video from the Library of Congress. Another place to learn more is Bagit's wikipedia page. And if your ready to use BagIt, you can download it on Github.

7. What to do if a preservation copy has changed? Can you fix it?
Hopefully, you'll have multiple copies of a file, and the preservation copy can be replaced with a "good" one. For situations where this isn't the case, someone with expertise in the file format should be able to address the issue, as explained by @dericed:


8. What are some best practices or tools for data preservation?

A good place to start would be the How-to Guides and Checklists from the Digital Curation Centre. Then read through the rest of their website -- its a gold-mine of information on curating digital research! Library of Congress has recommended formats for datasets and databases, as well as a report on evaluating file formats for datasets and information on types of dataset file formats. Stanford also has a good guide covering many aspects of digital curation for research data. SCAPE is a project of the Open Preservation Foundation that develops software tools and training materials for large scale data preservation.

Written by Jenny Mullins


Tuesday, June 23, 2015

Baker Library in the Dartmouth College Photographic Files Collection

During the month of May, close to 1500 photographs of Baker Library were added to the Dartmouth College Photographic Files Collection. Included are many photos of the Baker Library building, interior and exterior, including its construction, as well as people that have worked here over many years. Here are some samples:


View a much larger selection here.

The Dartmouth College Photographic Files project began in early 2012 and is part of the Dartmouth Digital Collections. The project's goal is to make over 80,000 photographs stored in file cabinets in Rauner Special Collections available online. Images date from the early years of photography (ca. 1850s) to the present and include images of nearly all aspects of Dartmouth College life. To date there are over 36,000 photos from the collection online. We add approximetly 1,000 photographs to the collection every month. We are working through the photographs alphabetically and have reached the letter "M". See additional photographs of Feldbery Library; Dana Biomedical Library and Kresge Library.

If you have questions about the Photographic Files Collection contact Rauner Special Collections If you have questions about the ditital imaging of the collection contact William B. Ghezzi or Ryland Ianelli in the Digial Production Unit.

Written by William B. Ghezzi


Tuesday, April 21, 2015

Preservation Week Webinars: April 26-May 2, 2015

Preservation Week is an annual celebration to highlight what organizations and individuals can do to preserve collections.  These webinars are available free of charge:

April 28th - Moving Image Preservation 101Sponsored by HF Group & George Blood, LP
This presentation covers the basic composition and history of film and video technology, particularly as it relates to formats found within personal and family collections. Tips and tricks for preserving your personal moving image materials will be addressed so that future generations can continue to enjoy your family movies and videos.
More information: http://www.ala.org/alcts/confevents/upcoming/webinar/042815

April 30th - Digital Preservation for Individuals and Small GroupsSponsored by Gaylord.
As technology changes, the greatest threat to preserving digital files is obsolescence. Files may get stuck on obsolete media or in some form that may become unusable in time. This webinar can help increase your understanding of what it takes to preserve commonly used digital files such photos, recordings, videos and documents. Learn about the nature of the digital-preservation challenge and hear about some simple, practical tips and tools to help you preserve your digital stuff.
More information: http://www.ala.org/alcts/confevents/upcoming/webinar/043015

May 1st - Disaster Response Q&A
Once a disaster strikes, the knee-jerk reaction is to rush in and save everything, but racing in without advance planning puts collections at risk of more damage and staff at risk of injury. This session will feature a live question-and-answer session. Participants will have an opportunity to comment on the recording of the 2010 webinar, "Disaster Response" and to ask questions of Nancy Kraft.
More information: http://www.ala.org/alcts/confevents/upcoming/webinar/050115

*****************
How to Register
There are no fees for these webinars, but you must register online.
For additional information and access to registration links, please go to the following website:
http://www.ala.org/alcts/confevents/upcoming/webinar/042815

ContactFor questions or comments related to registration or the webinars, contact Julie Reese, ALCTS Events Manager at 1-800-545-2433, ext. 5034 or jreese@ala.org.

Thanks to the American Library Association, Association for Library Collections & Technical Services, Continuing Education Committee for this information.

Tuesday, December 9, 2014

Merging Images in Photoshop, Part One

One of the most common problems in digitization is how to deal with an image that is too big for your camera or scanner. The simplest solution is to photograph or scan the object in separate pieces, then merge those pieces together, however this can present its own set of problems to those unfamiliar with imaging software.

In this post I will be describing my own method for merging together images. There are many other ways to accomplish these tasks, and if you have a way that works for you, I encourage you to keep using it, but also be aware of its potential pitfalls. The main benefits of my own method are the ability to quality-check your work as you go, and make simple non-destructive edits that can be changed or reversed as needed. Also, for simplicity’s sake, I will be referring to my own Mac OS based workflow for menus and keyboard shortcuts.


Here is the whole image that we’re trying to assemble, and for whatever reason, it’s been captured in two side-by-side pieces in the standard .tiff format. It is crucially important, when capturing, to make sure there is overlap between the captures. This is going to help us check how well-aligned our merging is, so the more overlap the better.

Notice how each side is wider than half of the image

Now that we’ve got our two images, open both in Adobe Photoshop and choose whichever one you want to start working on. I usually go from left to right for simplicity’s sake, so here I will be starting on the left side of the image.

In Photoshop, select the Image drop-down file menu, and select “Canvas Size…” (or use the keyboard shortcut: option+command+C). Click on the canvas width field, and double it. In the “Anchor” field, select the leftmost column of the grid so that Photoshop knows where to put the empty space.


You should be left with an image like this:


It will end up a little wider than is necessary, but it’ll be easier to trim it down after the fact than to add more space. This will now become our “master” file. Do a “Save As” at this point and designate it as such.

Next, go to the second image that we are going to merge into the master (in this case, the right side image). The next step should be familiar to most computer users: select all of the image (command+A), and copy it to the clipboard (command+C). Then go back to the master file and use paste (command+V) to add it into the image.


If you’re paying attention, you’ll obviously notice that this new image is not in the correct position. However, by looking at the Layers panel on the right side of Photoshop you’ll see that the new image is on its own layer, resting on top of the background (if you do not see the Layers panel, select the “Window” drop-down menu and enable “Layers” there). Thus we can edit it without disturbing the original “bottom” layer.


Now, with the top layer selected, click on the “Opacity” field in the Layers panel and set it to 40%. This will make the top layer semi-transparent and allow us to line it up with the bottom layer.

Then, with the Move tool selected (V), begin moving the top layer around and trying to find where it lines up. Look for any solid shapes that are shared by both images, or where the borders intersect. Letterforms provide nice clear and easily-spottable shapes, which is why I have used them in this example, but it can be anything so long as it’s shared by both images.


We’re getting there, but it’s obviously still not right. At this point, find an area of overlap and zoom in closely. Then, with both the top layer and the move tool selected, simply “nudge” the top layer into place using the arrow keys. The arrow keys will only move the layer one pixel at a time, so obviously this is for the finest level of adjustments.

Almost...

Nailed it!

Now for the final steps! In the layers panel, set the top layer’s opacity back to 100%. Then inspect the images along the borders, making sure that it looks seamless. While checking for quality be sure to zoom in and out.


At this point you can crop the image down to its original size, and it will be ready to go. However, one important piece to remember is that layered .tiffs, in addition to simply being larger files, are also not commonly supported by web or other software. What I like to do at this point is to save the “Master” file with both layers, and then create a new version for common use. The common use version will get flattened (Layer -> Flatten Image) then do a Save As in whatever format is required such as .jpeg or .pdf. This way, if any changes need to be made, we can always go back to the Master version.

And there you have it! A nice, seamless image. In the next post in this series, I will go into more detail for dealing with other problems, such as skew and mismatched backgrounds or details.

Written by Ryland Ianelli

Tuesday, October 28, 2014

Dartmouth Library Joins the National Digital Stewardship Alliance


We are very excited to announce that Dartmouth College Library has joined the National Digital Stewardship Alliance (NDSA), a consortium of organizations that are committed to the long-term preservation of digital information. The mission of the NDSA is to establish, maintain, and advance the capacity to preserve our nation's digital resources for the benefit of present and future generations. Members include universities, consortia, professional societies, commercial businesses, professional associations, and government agencies at the federal, state, and local level.

The NDSA is organized into 5 working groups: Content, Standards and Practices, Infrastructure, Innovation, and Outreach. Each group develops and executes a series of projects, which have included:

·         Developing the Levels of Preservation, a set of guidelines on tiered levels of digital preservation (Infrastructure WG)

·         Publishing a report on "Issues in the Appraisal and Selection of Geospatial Data"  (Content WG)

·         Creating Digital Preservation in a Box, a toolkit to support outreach activities that introduce the basic concepts of preserving digital information (Outreach WG)

·         Recognizing innovation in the community through the NDSA Innovation Awards (Innovation WG)

I am very excited to join the Standards and Practices Working Group, which works to "facilitate a community-wide understanding of the role and benefit of standards in digital preservation and how to use them effectively to ensure durable and usable collections." Projects undertaken by this group include a report on "The Benefits and Risks of the PDF/A-3 File Format for Archival Institutions" and a recent survey assessing stumbling blocks for video preservation.

Written by Jenny Mullins


Tuesday, October 14, 2014

Dartmouth at the Digital Directions 2014 Conference

Image from the blog PDXretro.com

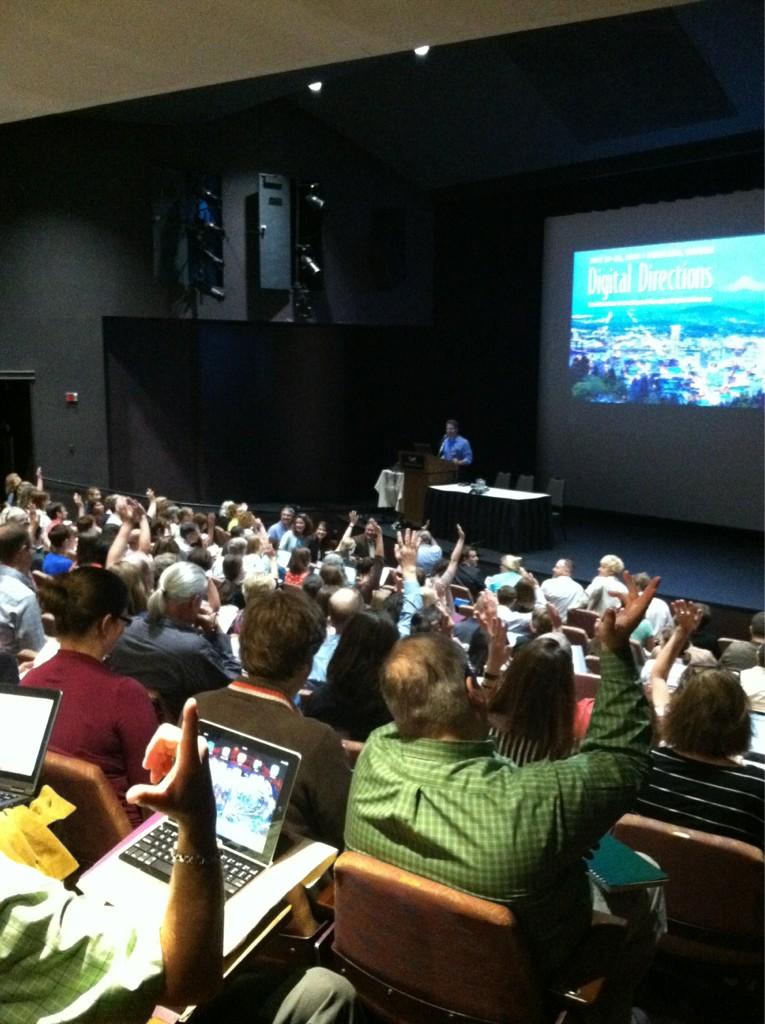
This past July I had the great opportunity to attend the Northeast Document Conservation Center’s Digital Directions 2014 conference. In a lucky turn, this year’s conference was held in Portland, Oregon, home of my alma mater, Reed College. In addition to reexperiencing the highlights of one of my favorite American cities, I was able to meet and engage with many people doing amazing work in digital collections across the country and beyond.


The conference covered a fascinating diversity of topics, from high-level project management and planning to specific examples of workflows and equipment setups. One of the first things impressed upon me was the fascinating diversity of digitization efforts occurring across the world. As the demand for digital content continues to expand, many institutions are rushing to fill that need. Because of this, it can often seem that no two institutions’ digital programs are the same, or even particularly similar.

To its credit, the Digital Directions did a phenomenal job accounting for these various setups. The three days were jam-packed with a fascinating variety of discussion topics and presentations. The first day consisted of mostly big-picture type talks. We discussed the interplay between digital preservation (maintenance of access to digital content) and digital curation (adding value to digital content), as well as how to craft each institution’s best practices and standards according to their needs. The day was wrapped up with an impressively no-nonsense discussion about rights and responsibilities from a legal perspective by Peter Hirtle, followed by a lovely meet-and-greet at the Portland Art Museum.

The following days covered a wide variety of topics, including a fascinating section about audio and video digitization (an area unfortunately outside my range of experience). However, it soon became apparent that the challenges faced by those audio and video digitization teams were remarkably similar to my own in the world of object and document reproduction. Many digitization projects face the same fundamental roadblocks: time, equipment, resources, access, and storage.
Image from NEDCC's twitter account

While the specifics varied, these fundamental issues could not help but make themselves apparent. The relative merits of, say, cloud storage (to pick a random example), can be endlessly debated among digital librarians, and indeed I’d doubt there ever will be a definitive final-word on this topic. But the crucial takeaway must be a willingness to engage with these issues, understanding the risks and drawbacks inherent in each option so that they can be minimized, or at the very least understood fully so that we may deal with them more effectively in the future. Among the many useful things I learned at Digital Directions 2014, perhaps the most important one was that my own peers are an incredible resource, both within Dartmouth and world-wide. By learning through their experiences and sharing my own, I hope to do my part to keep the Dartmouth Library’s Digital Collection growing and improving well into the future.

Written by Ryland Ianelli

Tuesday, September 30, 2014

100-ish Days of Digital Preservation

Hello, there. It's been a little over 100 days since I started as Dartmouth College Library's first Digital Preservation Librarian. I've been working closely with staff in many departments to define my role and work out how best to ensure long term access to the Library's digital content. Here are some of the things that I've been up to:

  • Maxed out our master file server space.
  • Learned about awesome projects and connected with colleagues at Digital Preservation 2014.
  • Made some head-way into assessing our e-resource preservation strategies.
  • Used BagIt to package 45,000 files totaling 2413 GB for long-term storage (see above re: maxing out server space).
  • Started digging into PREMIS .
  • Learned to harness the power of Twitter for professional research #digipres .
  • Started brainstorming strategies for preserving analog and born-digital a/v content.
  • Dipped my toes into web and database preservation in response to a faculty inquiry.
  • Got really excited about sustainability and digital humanities projects.
Digital Preservation Brainstorming!

 I’m looking forward to my role in the Library continuing to evolve and grow over time. As these and other projects develop, I will tell you all about them here. Stay tuned for the next 100-ish days of Digital Preservation!


Written by Jennifer Mullins

Tuesday, June 24, 2014

Digital Production Unit Update, Part 2


The primary focus of the Digital Production Unit over the past few months has been to incorporate the new reprographic system into our workflows. Since we started using the new equipment in January we have been able to take advantage of its speed and high quality imaging in a number of projects. 


We have redesigned our workflow for the Dartmouth College Photographic Files collection to use the new camera exclusively. The previous workflow for this ongoing project used two scanners on two computers and required additional post production work to gather all of the images together. Our new workflow consolidates all of that work onto one workstation. The streamlined workflow has created noticeable positive effects in the time it takes to complete work on this project.

Dartmouth College Photographic Files collection: (http://libarchive.dartmouth.edu/cdm/search/collection/photofiles/collection)

One of the first projects we tackled with the new equipment was to shoot recent Winter Carnival Posters. This was a great learning opportunity for us. The posters are large and colorful and gave us a chance to develop our skills with the hardware and software. We will add individual new posters as they become available in future Winter terms. In addition, we are in the planning stages of a project to reshoot all of the posters to upgrade the quality of our master images.


We have also been able to use the equipment in support of smaller projects in Rauner Special Collections and for exhibits by Education and Outreach. Other work with the camera includes one-offs for various projects, quality assurance and corrections.


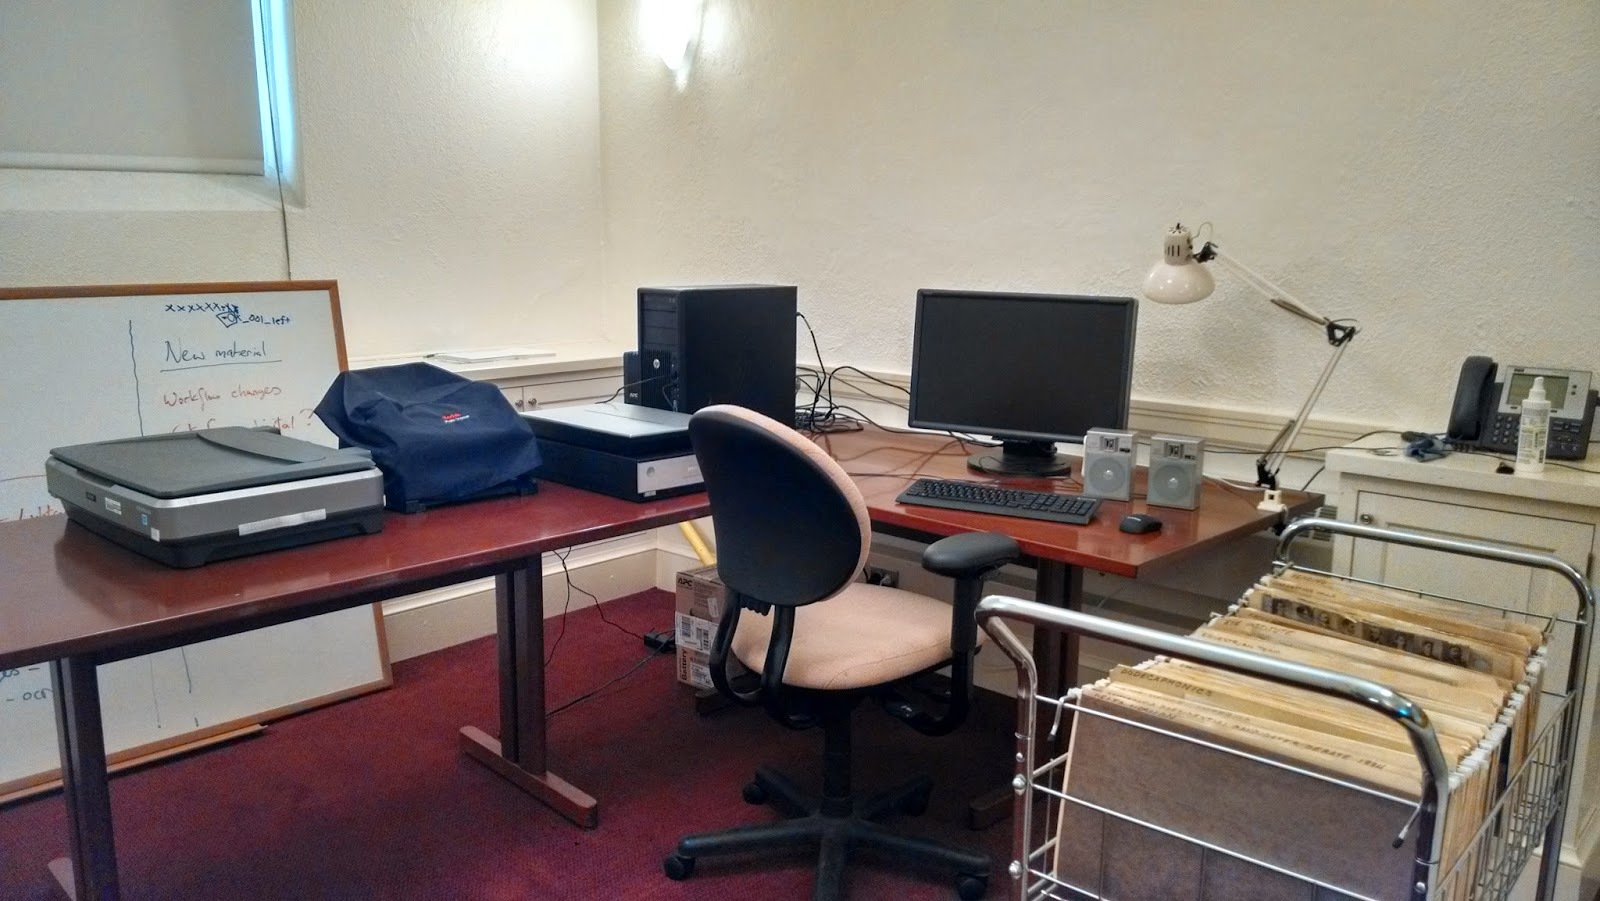
In other news, we continue to redesign our work area. We recently moved all of the scanning equipment into room 2D, turning that space into our scanning lab.

By Willliam B. Ghezzi

Monday, April 28, 2014

Preservation Week: Storing Papers + Open House Today

During Preservation Week libraries all over the country present events, activities, and resources that highlight what we can do, individually and together, to preserve our personal and shared collections.

Preservation Tip:
Paper:
Store your paper materials in an environment with relatively low humidity, away from direct sunlight, and on shelves not on the floor.  Whether you have books, maps, letters or other items made primarily of paper, a good environment will contribute a lot to their future condition.

For more information check out the National Archives website http://www.archives.gov/preservation/

OPEN HOUSE TODAY - 11:00-1:00PM
Digitization for Access and Preservation
Baker Room 02

Dartmouth College Library Digital Program: Digitization for Access and Preservation 

Visit the Digital Production Unit at Baker Library to learn how the Library’s Digital Program provides access and preservation to the Library’s collections.  An open house showcasing conservation, digitization, and digital preservation will be held on Monday, April 28, from 11 am until 1 pm in Baker Library, Room 2 (east end of the Orozco Corridor).  

Tuesday, April 22, 2014

Dartmouth College Library Digital Program: Digitization for Access and Preservation

Visit the Digital Production Unit at Baker Library to learn how the Library’s Digital Program provides access and preservation to the Library’s collections.  An open house showcasing conservation, digitization, and digital preservation will be held on Monday, April 28, from 11 am  until 1 pm in Baker Library, Room 2 (east end of the Orozco Cooridor).  This event is part of a nation wide celebration of the American Library Association’s observance of Preservation Week.

Tuesday, January 21, 2014

Personnel Announcement

I am delighted to announce that Jenny Brice will be Dartmouth College Library’s first Digital Preservation Librarian effective May 12, 2014.  Jenny joins us from the Bay Area Video Coalition in San Francisco, California where she is Preservation Coordinator.  In that capacity she supports the development of the Dance Heritage Coalition Dance Preservation and Digitization Project, a digital repository of video documenting America’s dance history.

Jenny also manages the AV Artifact Atlas, an on-line tool that aids in the identification and documentation of errors created during analog recording or digital transfer.

Jenny has an undergraduate degree in Comparative Literature from the University of California Berkeley.  She received her Masters of Library and Information Science from the University of Pittsburgh with a Preservation Specialization.   Jenny also has worked as a conservation technician for the University of Pittsburgh Library and the New York Public Library.

I would like to thank my colleagues on the search committee (Bill Ghezzi, Paul Merchant, Jr., Jay Satterfield, and Becky Torrey) for their insights and dedication to our task.  This position is funded from the Manton Foundation Endowment that supports the Dartmouth Digital Library Program.

Barb Sagraves, Head, Preservation Services 

Tuesday, January 7, 2014

Big Plans in Digital Production

Something exciting is brewing in the depths of Baker-Berry! 

New workstations, and mysterious boxes have been arriving steadily. 


Stay tuned for future updates from the Digital Production Unit!


Written by Ryland Ianelli

Tuesday, August 6, 2013

Digital Preservation Librarian - position opening

I am delighted to announce the new Digital Preservation Librarian position. The Digital Preservation Librarian will play a key role in preserving Dartmouth College Library's collections by enhancing the Library's capacity to preserve and provide access to all our digital materials both commercially acquired and locally produced.

This position is critical to support the long-term preservation of the Library's collections, and to increase our engagement with the difficult issues surrounding very long term retention of digital data. The position is funded from the Manton Foundation Endowment that supports the Dartmouth Digital Library Program.

A fuller description of the position may be found at: https://searchjobs.dartmouth.edu/postings/20445

Tuesday, July 30, 2013

Slide Scanning Tips

When I was an undergraduate student I worked in my college library’s Visual Resource Collection in a somewhat similar position to the one I’m in now. The VRC was primarily a resource for my school’s Art History Department (my major), and their main asset was row upon row of metal filing cabinets filled to the brim with 35mm slides.

As the years went on, we unsurprisingly saw more and more art history professors moving towards digital teaching tools. As such, the VRC department had no choice but to move with the times and focus on the digitization of their existing collection.

This was my first experience scanning 35mm slides, and while it fundamentally follows the same principles as scanning anything else, there are some considerations to be made. The main question is one of scanner preference: mechanical feed or flatbed?

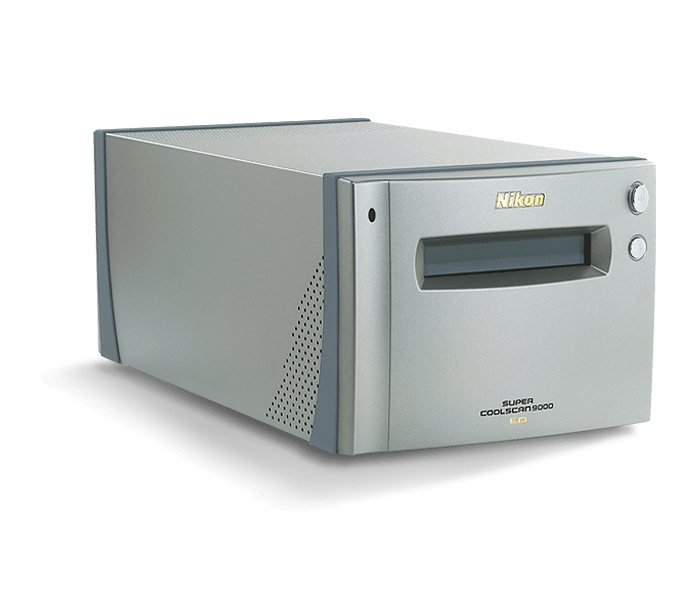
Nikon Super COOLSCAN 9000 ED; a professional-quality mechanical feed slide and negative scanner I used at my previous job. Image copyright Nikon USA.

Mechanical feed slide scanners have several distinct advantages: they are smaller and very easily portable; they are often designed to accept large batches of scans in a workflow environment; and they require very little adjustment or calibration on the user end. However, there are drawbacks as well. Much like the mechanical feed photo scanner, it is prone to dust. This dust is significantly more troublesome in the final product due to the small size of the originals. Additionally, the user-friendliness can sometimes translate to poor customizability. And of course, the slide scanner’s utility is limited to 35mm slides or film negatives.

The Epson Expression 10000XL, with transparency unit and slides ready for scanning

While flatbed scanners are designed with larger printed material in mind, often times these too can accept slides or photo negatives with certain peripheral attachments. In the Dartmouth Library Digital Production Unit, our Epson Expression 10000XL flatbed scanner has such attachments. The biggest and most crucial is the transparency unit. This piece replaces the original scanner cover with what is essentially a lightbox, backlighting the slides and providing consistent illumination. Additionally, there are slide and negative holders that help keep your images consistent.

The biggest drawback to the flatbed scanner is that sometimes the scanner itself has not been designed for the high-resolution settings required to scan such small objects at archival quality. Usually a good resolution for 35mm slides is 2,400 dpi; four times the resolution of our usual scans. A good high-quality scanner should have no problem with this, but many consumer-level scanners simply can’t scan a resolution that high.

While our Digital Production Department has not had much reason to incorporate slide and negative scanning into our workflow thusfar, it can’t hurt to be prepared for whatever digitization projects come our way.

Tuesday, April 16, 2013

Dust in the Machine

In the last year since the Digital Production Unit was added to Preservation Services we've grown and adapted to many challenges. One of our most resource-heavy projects is the Dartmouth Photo Files, a project to scan and collect the college's photographic records currently being held in Rauner Special Collections Library. So far we've scanned and uploaded nearly 8,500 photographs; merely one-tenth of the estimated total. We realized quite early that a project of this scope and type has different requirements than the smaller projects we regularly take on. This post will address the recurring issue of dust in the scanner.

While flatbed scanners like our Epson Expression 10000XL merely require the occasional spritz of glass-cleaner to maintain, our feed scanner, the Kodak PS810, is far more demanding due to its complicated internal mechanism and heavy amount of use. A piece of dust on a flatbed scanner is quite difficult to notice, and usually does not produce an unusable result (at the very worst it will catch the reflection of the scanner's lamps and discolor a few pixels). However a piece of dust inside the feed scanner will leave a quite noticeable mark on the image in the form of a colored (usually green) streak across the image. This happens when a piece of dust is trapped on the scanner lamps and the image is dragged over it, producing a line, like this:


Dealing with this dust starts at the beginning of every scanning session. Every day we use it the Kodak PS810 (as well as its surrounding area) is thoroughly cleaned. The feed rollers are wiped free of dust and the lamps are cleaned off with special polishing wipes. At the end of this process a "transport cleaning sheet" is fed through the scanner; this sheet has a sticky surface and is designed to pick up the last stray bits of dust. Afterwards the machine is ready to scan.

However, dust does not simply stay out of places that have been cleaned once, and in the Photo Files project we found that many of the photos themselves are responsible for dragging dust into the scanner's inner workings. In most cases where this occurs the dust stays on the lamp for several photos until it is dragged off, producing a sequence of photos all with the same green line across them. Needless to say, this is problematic for our finished product.

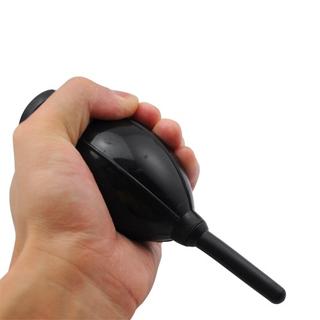
After attempting a few solutions to this problem, the best one we came up with was a spot-dusting of every photo before it goes through the scanner using a squeeze-duster like this:


While the procedure isn't perfect, it does lower instances of this problem drastically. Remaining dusty images are caught during our quality-assurance step and rescanned. Some photo scanning software claims to be able to remove this effect through digital manipulation (including Kodak's own software, which we do not use), however we chose not to adopt this in our procedures in order to maintain the integrity of the original, unaltered image. The result of such process is as claimed, removing the green dust lines, however it accomplishes by distorting the parts of the image directly above and below the dust, creating a blurred effect that is noticeable upon close inspection. While this is probably a good solution for a hobbyist, we intend to ensure the best possible condition for our scans in the long run. In this case the old saying holds true: a pinch of prevention saves a pound of cure, and by ensuring best practices at the scanning phase we can drastically reduce the need for rescans.

Written by Ryland Ianelli.