Preservation Week is an annual celebration to highlight what organizations and individuals can do to preserve collections. These webinars are available free of charge:
April 28th - Moving Image Preservation 101Sponsored by HF Group & George Blood, LP
This presentation covers the basic composition and history of film and video technology, particularly as it relates to formats found within personal and family collections. Tips and tricks for preserving your personal moving image materials will be addressed so that future generations can continue to enjoy your family movies and videos.
More information: http://www.ala.org/alcts/confevents/upcoming/webinar/042815
April 30th - Digital Preservation for Individuals and Small GroupsSponsored by Gaylord.
As technology changes, the greatest threat to preserving digital files is obsolescence. Files may get stuck on obsolete media or in some form that may become unusable in time. This webinar can help increase your understanding of what it takes to preserve commonly used digital files such photos, recordings, videos and documents. Learn about the nature of the digital-preservation challenge and hear about some simple, practical tips and tools to help you preserve your digital stuff.
More information: http://www.ala.org/alcts/confevents/upcoming/webinar/043015
May 1st - Disaster Response Q&A
Once a disaster strikes, the knee-jerk reaction is to rush in and save everything, but racing in without advance planning puts collections at risk of more damage and staff at risk of injury. This session will feature a live question-and-answer session. Participants will have an opportunity to comment on the recording of the 2010 webinar, "Disaster Response" and to ask questions of Nancy Kraft.
More information: http://www.ala.org/alcts/confevents/upcoming/webinar/050115
*****************
How to Register
There are no fees for these webinars, but you must register online.
For additional information and access to registration links, please go to the following website:
http://www.ala.org/alcts/confevents/upcoming/webinar/042815
ContactFor questions or comments related to registration or the webinars, contact Julie Reese, ALCTS Events Manager at 1-800-545-2433, ext. 5034 or jreese@ala.org.
Thanks to the American Library Association, Association for Library Collections & Technical Services, Continuing Education Committee for this information.

Showing posts with label training. Show all posts
Showing posts with label training. Show all posts
Tuesday, April 21, 2015

Monday, April 13, 2015
Merging Images in Photoshop, Part Two
While my first post in this series covered some basics of non-destructive image merging in Adobe Photoshop, this post aims to give you some tools to work with less ideal images.
A typical problem faced by many when attempting to merge images is how to deal with slight variations in your materials. These variations can be a result of the hardware you use (scanner or camera), lighting conditions, software, or a myriad other factors.
In this scenario I'll use an image from a scanned book that has a lighting problem. This is a very common difficulty when scanning books on a flatbed; the book's gutter will raise up from the scanner's surface, giving it a darker tone and distorting the content. Applying pressure to the book may work sometimes, but often we do not want to risk damaging our books (or, worst-case-scenario, our equipment) that way. Much safer to work digitally.

The first step is identifying the cutoff point where the gutter begins to negatively affect image quality. As you can see from this image. As always, make sure you've saved a master version before making any edits.

Use the Rectangle Marquee tool to isolate the "safe zone" of the page, where the page's content is mostly unaffected by the gutter. Copy this selection and paste it into a new document with approximately the same dimensions as the original document. This is our new "base" document. I will usually put the word "EDIT" in its title somewhere so it won't be mistaken for the master.

In situations like this when we are dealing with an off-white paper, we'll want to make sure our background matches the paper's tone. Use the Eyedropper tool to select the page tone, and use the paint bucket to fill it in the background of the new base document.


What we are going to do next is create an amalgam of the image's two elements (page and background) to create a new version with improved legibility. To accomplish this we are going to use Photoshop's Layer Mask tool. Layer Mask is incredibly useful for photo editing, and best of all it is a non-destructive solution, meaning whatever you do with it can always be easily undone. The Layer Mask is very much what it sounds like: a layer placed on top of each image that can be "masked" or "unmasked," concealing or revealing the image's contents. Select the right side layer and click "Add Layer Mask" at the bottom of the Layer menu. You will now see a small white rectangle linked to that layer; that's your layer mask. The color white means "unmasked," so right now it's simply sitting on top of your original layer waiting for you to give it instructions.

Next, be sure you have the correct layer, AND your layer mask selected, or else you will alter the image itself. The Layer Mask functions in grayscale. Black is "masked," white is "unmasked," and grays are everything in between. Set your foreground color to black. Select the brush tool, and reduce the hardness to 0 (use whatever diameter you feel comfortable with). Check again to make sure you're still on your layer mask, and simply begin lightly touching up the problem spots along the gutter with your brush. Use single clicks rather than click-and-drag, that way you will make very minor adjustments while you get a feel for the technique.

As you can see, we've fixed the page to appear legible and flat. But be warned, this exact method won't work for every situation. If you have content that is deep in the book's gutters, you will likely have to accept a less-than-perfect image. However these techniques can still be used to improve the image quality in those situations, it is simply more difficult to get a "perfect" image. Vary your brush settings and color in the Layer Mask (experiment using a 50% grayscale) to find solutions that best suit your situation.
Written by Ryland Ianelli
A typical problem faced by many when attempting to merge images is how to deal with slight variations in your materials. These variations can be a result of the hardware you use (scanner or camera), lighting conditions, software, or a myriad other factors.
In this scenario I'll use an image from a scanned book that has a lighting problem. This is a very common difficulty when scanning books on a flatbed; the book's gutter will raise up from the scanner's surface, giving it a darker tone and distorting the content. Applying pressure to the book may work sometimes, but often we do not want to risk damaging our books (or, worst-case-scenario, our equipment) that way. Much safer to work digitally.
The first step is identifying the cutoff point where the gutter begins to negatively affect image quality. As you can see from this image. As always, make sure you've saved a master version before making any edits.
In situations like this when we are dealing with an off-white paper, we'll want to make sure our background matches the paper's tone. Use the Eyedropper tool to select the page tone, and use the paint bucket to fill it in the background of the new base document.
What we are going to do next is create an amalgam of the image's two elements (page and background) to create a new version with improved legibility. To accomplish this we are going to use Photoshop's Layer Mask tool. Layer Mask is incredibly useful for photo editing, and best of all it is a non-destructive solution, meaning whatever you do with it can always be easily undone. The Layer Mask is very much what it sounds like: a layer placed on top of each image that can be "masked" or "unmasked," concealing or revealing the image's contents. Select the right side layer and click "Add Layer Mask" at the bottom of the Layer menu. You will now see a small white rectangle linked to that layer; that's your layer mask. The color white means "unmasked," so right now it's simply sitting on top of your original layer waiting for you to give it instructions.
Next, be sure you have the correct layer, AND your layer mask selected, or else you will alter the image itself. The Layer Mask functions in grayscale. Black is "masked," white is "unmasked," and grays are everything in between. Set your foreground color to black. Select the brush tool, and reduce the hardness to 0 (use whatever diameter you feel comfortable with). Check again to make sure you're still on your layer mask, and simply begin lightly touching up the problem spots along the gutter with your brush. Use single clicks rather than click-and-drag, that way you will make very minor adjustments while you get a feel for the technique.
As you can see, we've fixed the page to appear legible and flat. But be warned, this exact method won't work for every situation. If you have content that is deep in the book's gutters, you will likely have to accept a less-than-perfect image. However these techniques can still be used to improve the image quality in those situations, it is simply more difficult to get a "perfect" image. Vary your brush settings and color in the Layer Mask (experiment using a 50% grayscale) to find solutions that best suit your situation.
Written by Ryland Ianelli
Tuesday, December 9, 2014
Merging Images in Photoshop, Part One
One of the most common problems in digitization is how to deal with an image that is too big for your camera or scanner. The simplest solution is to photograph or scan the object in separate pieces, then merge those pieces together, however this can present its own set of problems to those unfamiliar with imaging software.
In this post I will be describing my own method for merging together images. There are many other ways to accomplish these tasks, and if you have a way that works for you, I encourage you to keep using it, but also be aware of its potential pitfalls. The main benefits of my own method are the ability to quality-check your work as you go, and make simple non-destructive edits that can be changed or reversed as needed. Also, for simplicity’s sake, I will be referring to my own Mac OS based workflow for menus and keyboard shortcuts.

Here is the whole image that we’re trying to assemble, and for whatever reason, it’s been captured in two side-by-side pieces in the standard .tiff format. It is crucially important, when capturing, to make sure there is overlap between the captures. This is going to help us check how well-aligned our merging is, so the more overlap the better.
Now that we’ve got our two images, open both in Adobe Photoshop and choose whichever one you want to start working on. I usually go from left to right for simplicity’s sake, so here I will be starting on the left side of the image.
In Photoshop, select the Image drop-down file menu, and select “Canvas Size…” (or use the keyboard shortcut: option+command+C). Click on the canvas width field, and double it. In the “Anchor” field, select the leftmost column of the grid so that Photoshop knows where to put the empty space.

You should be left with an image like this:

It will end up a little wider than is necessary, but it’ll be easier to trim it down after the fact than to add more space. This will now become our “master” file. Do a “Save As” at this point and designate it as such.
Next, go to the second image that we are going to merge into the master (in this case, the right side image). The next step should be familiar to most computer users: select all of the image (command+A), and copy it to the clipboard (command+C). Then go back to the master file and use paste (command+V) to add it into the image.

If you’re paying attention, you’ll obviously notice that this new image is not in the correct position. However, by looking at the Layers panel on the right side of Photoshop you’ll see that the new image is on its own layer, resting on top of the background (if you do not see the Layers panel, select the “Window” drop-down menu and enable “Layers” there). Thus we can edit it without disturbing the original “bottom” layer.

Now, with the top layer selected, click on the “Opacity” field in the Layers panel and set it to 40%. This will make the top layer semi-transparent and allow us to line it up with the bottom layer.
Then, with the Move tool selected (V), begin moving the top layer around and trying to find where it lines up. Look for any solid shapes that are shared by both images, or where the borders intersect. Letterforms provide nice clear and easily-spottable shapes, which is why I have used them in this example, but it can be anything so long as it’s shared by both images.

We’re getting there, but it’s obviously still not right. At this point, find an area of overlap and zoom in closely. Then, with both the top layer and the move tool selected, simply “nudge” the top layer into place using the arrow keys. The arrow keys will only move the layer one pixel at a time, so obviously this is for the finest level of adjustments.
Now for the final steps! In the layers panel, set the top layer’s opacity back to 100%. Then inspect the images along the borders, making sure that it looks seamless. While checking for quality be sure to zoom in and out.

At this point you can crop the image down to its original size, and it will be ready to go. However, one important piece to remember is that layered .tiffs, in addition to simply being larger files, are also not commonly supported by web or other software. What I like to do at this point is to save the “Master” file with both layers, and then create a new version for common use. The common use version will get flattened (Layer -> Flatten Image) then do a Save As in whatever format is required such as .jpeg or .pdf. This way, if any changes need to be made, we can always go back to the Master version.
And there you have it! A nice, seamless image. In the next post in this series, I will go into more detail for dealing with other problems, such as skew and mismatched backgrounds or details.
Written by Ryland Ianelli
In this post I will be describing my own method for merging together images. There are many other ways to accomplish these tasks, and if you have a way that works for you, I encourage you to keep using it, but also be aware of its potential pitfalls. The main benefits of my own method are the ability to quality-check your work as you go, and make simple non-destructive edits that can be changed or reversed as needed. Also, for simplicity’s sake, I will be referring to my own Mac OS based workflow for menus and keyboard shortcuts.
Here is the whole image that we’re trying to assemble, and for whatever reason, it’s been captured in two side-by-side pieces in the standard .tiff format. It is crucially important, when capturing, to make sure there is overlap between the captures. This is going to help us check how well-aligned our merging is, so the more overlap the better.
 |
| Notice how each side is wider than half of the image |
Now that we’ve got our two images, open both in Adobe Photoshop and choose whichever one you want to start working on. I usually go from left to right for simplicity’s sake, so here I will be starting on the left side of the image.
In Photoshop, select the Image drop-down file menu, and select “Canvas Size…” (or use the keyboard shortcut: option+command+C). Click on the canvas width field, and double it. In the “Anchor” field, select the leftmost column of the grid so that Photoshop knows where to put the empty space.
You should be left with an image like this:
It will end up a little wider than is necessary, but it’ll be easier to trim it down after the fact than to add more space. This will now become our “master” file. Do a “Save As” at this point and designate it as such.
Next, go to the second image that we are going to merge into the master (in this case, the right side image). The next step should be familiar to most computer users: select all of the image (command+A), and copy it to the clipboard (command+C). Then go back to the master file and use paste (command+V) to add it into the image.
If you’re paying attention, you’ll obviously notice that this new image is not in the correct position. However, by looking at the Layers panel on the right side of Photoshop you’ll see that the new image is on its own layer, resting on top of the background (if you do not see the Layers panel, select the “Window” drop-down menu and enable “Layers” there). Thus we can edit it without disturbing the original “bottom” layer.
Now, with the top layer selected, click on the “Opacity” field in the Layers panel and set it to 40%. This will make the top layer semi-transparent and allow us to line it up with the bottom layer.
Then, with the Move tool selected (V), begin moving the top layer around and trying to find where it lines up. Look for any solid shapes that are shared by both images, or where the borders intersect. Letterforms provide nice clear and easily-spottable shapes, which is why I have used them in this example, but it can be anything so long as it’s shared by both images.
We’re getting there, but it’s obviously still not right. At this point, find an area of overlap and zoom in closely. Then, with both the top layer and the move tool selected, simply “nudge” the top layer into place using the arrow keys. The arrow keys will only move the layer one pixel at a time, so obviously this is for the finest level of adjustments.
 |
| Almost... |
 |
| Nailed it! |
Now for the final steps! In the layers panel, set the top layer’s opacity back to 100%. Then inspect the images along the borders, making sure that it looks seamless. While checking for quality be sure to zoom in and out.
At this point you can crop the image down to its original size, and it will be ready to go. However, one important piece to remember is that layered .tiffs, in addition to simply being larger files, are also not commonly supported by web or other software. What I like to do at this point is to save the “Master” file with both layers, and then create a new version for common use. The common use version will get flattened (Layer -> Flatten Image) then do a Save As in whatever format is required such as .jpeg or .pdf. This way, if any changes need to be made, we can always go back to the Master version.
And there you have it! A nice, seamless image. In the next post in this series, I will go into more detail for dealing with other problems, such as skew and mismatched backgrounds or details.
Tuesday, October 14, 2014
Dartmouth at the Digital Directions 2014 Conference
 |
| Image from the blog PDXretro.com |
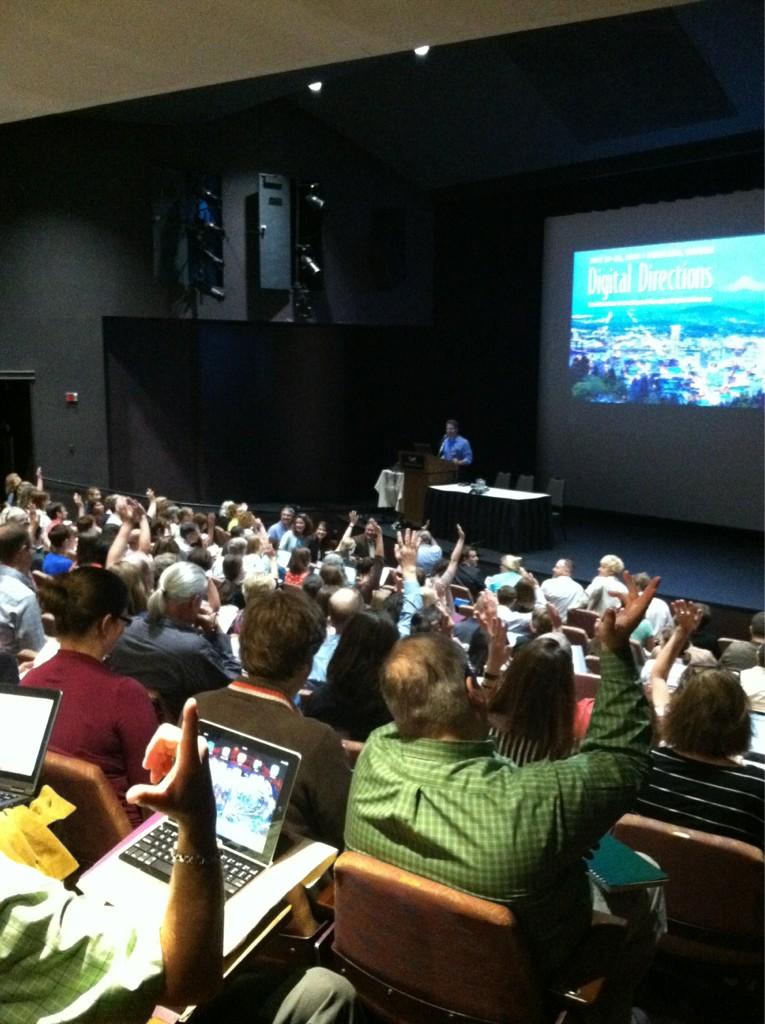
This past July I had the great opportunity to attend the Northeast Document Conservation Center’s Digital Directions 2014 conference. In a lucky turn, this year’s conference was held in Portland, Oregon, home of my alma mater, Reed College. In addition to reexperiencing the highlights of one of my favorite American cities, I was able to meet and engage with many people doing amazing work in digital collections across the country and beyond.

The conference covered a fascinating diversity of topics, from high-level project management and planning to specific examples of workflows and equipment setups. One of the first things impressed upon me was the fascinating diversity of digitization efforts occurring across the world. As the demand for digital content continues to expand, many institutions are rushing to fill that need. Because of this, it can often seem that no two institutions’ digital programs are the same, or even particularly similar.
To its credit, the Digital Directions did a phenomenal job accounting for these various setups. The three days were jam-packed with a fascinating variety of discussion topics and presentations. The first day consisted of mostly big-picture type talks. We discussed the interplay between digital preservation (maintenance of access to digital content) and digital curation (adding value to digital content), as well as how to craft each institution’s best practices and standards according to their needs. The day was wrapped up with an impressively no-nonsense discussion about rights and responsibilities from a legal perspective by Peter Hirtle, followed by a lovely meet-and-greet at the Portland Art Museum.
The following days covered a wide variety of topics, including a fascinating section about audio and video digitization (an area unfortunately outside my range of experience). However, it soon became apparent that the challenges faced by those audio and video digitization teams were remarkably similar to my own in the world of object and document reproduction. Many digitization projects face the same fundamental roadblocks: time, equipment, resources, access, and storage.
 |
| Image from NEDCC's twitter account |
While the specifics varied, these fundamental issues could not help but make themselves apparent. The relative merits of, say, cloud storage (to pick a random example), can be endlessly debated among digital librarians, and indeed I’d doubt there ever will be a definitive final-word on this topic. But the crucial takeaway must be a willingness to engage with these issues, understanding the risks and drawbacks inherent in each option so that they can be minimized, or at the very least understood fully so that we may deal with them more effectively in the future. Among the many useful things I learned at Digital Directions 2014, perhaps the most important one was that my own peers are an incredible resource, both within Dartmouth and world-wide. By learning through their experiences and sharing my own, I hope to do my part to keep the Dartmouth Library’s Digital Collection growing and improving well into the future.
Written by Ryland Ianelli
Tuesday, January 7, 2014
Big Plans in Digital Production
Something exciting is brewing in the depths of Baker-Berry!
New workstations, and mysterious boxes have been arriving steadily.


Stay tuned for future updates from the Digital Production Unit!
Written by Ryland Ianelli
Tuesday, November 5, 2013
In the Book Arts Workshop: Flat Sheet to Folio
Recently Book Arts Special Instructor Sarah Smith and I taught a two-day workshop in the Letterpress Studio, Flat Sheet to Folio creating a simple folded booklet using pressure printed imagery and letterpress printed text. Our project came from an exercise introduced to me by Steve Miller, professor of Book Arts at the University of Alabama, during a letterpress workshop at the Wells College Book Arts Summer Institute some years ago. Steve shared examples of this simple folded page and demonstrated its versatility in conveying a short piece of text with illustration. Many of the examples Steve shared used a linoleum block print. In our workshop we used the pressure printing technique.
 |
| We warmed up by creating an |
 |
| origami envelope to hold the finished edition. |
After discussing the way design and structure work together in this form, we began making our pressure prints. A pressure print uses a matrix under the printing paper that creates an impression when it comes in contact with an inked base plate held in the press bed. We used a piece of type-high Plexiglas-topped MDF or plywood. A word of caution: check packing carefully prior to printing so not to damage the press.
 |
| First we created the matrix from which to print the image. |
 |
| Then onto mixing ink color and printing. |
 |
| A finished matrix. |
 |
| Printing a pressure print. Placing the matrix under the printing paper and |
 |
| Printing as usual. |
 |
| A finished print. |
By the end of the first day we each had a stack of twenty prints ready for text.
 |
| The next day, Sarah presented a short lesson on setting type. |
 |
| Imposition. |
 |
| And then after mixing up a nice red-orange ink, |
 |
| demonstrated the process of priniting text. |
 |
| Once the Vandercook SP-20 was all set, I worked on the SP-15 with the students who wished to print with blue ink. |
As students switched out their type, the required adjustments for each person’s folio became an opportunity to learn some of the nuances of imposition. With all the printing completed, we cleaned up and distributed type.
Just before the end of the day we collated our sheets to complete the small edition. Each of us took away the sheets flat, which when dry, will become folios and fit into our envelopes. Lots of fun with image, text, and the press!

Written by Stephanie Wolff
Tuesday, October 8, 2013
Manage Your Photos with Adobe's Bridge and Lightroom
If you decide to digitize a collection of images, such as a photo album or a slideshow, there are literally thousands of different software solutions to go about organizing them. Many of these can come bundled with scanning or photo software, and often those can offer a relatively low-cost and hassle-free solution to keeping track of your images.
However, if you want to ensure the maximum compatibility and usability of your images over the long term, there are more advanced options available through Adobe's very popular line of professional software. The complete Creative Suite (and the newly-offered Creative Cloud) feature an almost overwhelming amount of tools, from film editing to website design, along with the nigh-essential Photoshop.
Two of these programs are designed for the main purpose of organizing and viewing large collections of images; something you might imagine is essential to the kinds of digitization projects taken on by the Dartmouth College Library's Digital Production Unit. Adobe Bridge and Adobe Lightroom each offer distinct advantages over the other, and while they may share some purposes, it can save you a lot of time to know which one suits your project best.
Adobe Bridge is, as its name implies, an excellent way to organize many different kinds of media, "bridging" many formats. It is designed to play nicely with all other Adobe programs, and offers an excellent alternative to the standard Mac OS Finder, or Windows Explorer when it comes to browsing collections. The interface can be altered modularly to suit a project, meaning you can re-size, add or delete tools from the main screen with great ease. Additionally, you can add or alter image metadata, and do batch file renaming. Its flexibility is its best selling point, making it a helpful addition to any Adobe-based workflow.
Lightroom, on the other hand, is designed specifically for photographs. In addition to letting users browse through collections of photographs, Lightoom offers far more tools for photo-editing than Bridge, and presents them in a way that is familiar for professional or amateur photographers. While at first blush this would appear similar to running a combination of Bridge and Photoshop, it actually has a few interesting tricks of its own.
The most important thing about Lightroom is to think of it within the context of a photographer's studio. The program is designed to take raw camera files (.dng is the most common format) and apply various changes to it without altering the originals. The entire editing action takes place within the Lightroom environment, so you are never in danger of losing data. You can think of your raw camera files as digital negatives, to be used and reused to create different print files. Lightroom easily stores setting data, allowing you to export as many kinds of derivative files as are needed. However, it is designed around these features. If you want to make actual changes to a master document you'll have to use Photoshop.
Between these two programs we can respond to all kinds of challenges in the Digital Production Unit, organizing and reworking files in the manner best suited to the project.
Written by Ryland Ianelli
However, if you want to ensure the maximum compatibility and usability of your images over the long term, there are more advanced options available through Adobe's very popular line of professional software. The complete Creative Suite (and the newly-offered Creative Cloud) feature an almost overwhelming amount of tools, from film editing to website design, along with the nigh-essential Photoshop.
Two of these programs are designed for the main purpose of organizing and viewing large collections of images; something you might imagine is essential to the kinds of digitization projects taken on by the Dartmouth College Library's Digital Production Unit. Adobe Bridge and Adobe Lightroom each offer distinct advantages over the other, and while they may share some purposes, it can save you a lot of time to know which one suits your project best.
Adobe Bridge is, as its name implies, an excellent way to organize many different kinds of media, "bridging" many formats. It is designed to play nicely with all other Adobe programs, and offers an excellent alternative to the standard Mac OS Finder, or Windows Explorer when it comes to browsing collections. The interface can be altered modularly to suit a project, meaning you can re-size, add or delete tools from the main screen with great ease. Additionally, you can add or alter image metadata, and do batch file renaming. Its flexibility is its best selling point, making it a helpful addition to any Adobe-based workflow.
Lightroom, on the other hand, is designed specifically for photographs. In addition to letting users browse through collections of photographs, Lightoom offers far more tools for photo-editing than Bridge, and presents them in a way that is familiar for professional or amateur photographers. While at first blush this would appear similar to running a combination of Bridge and Photoshop, it actually has a few interesting tricks of its own.
The most important thing about Lightroom is to think of it within the context of a photographer's studio. The program is designed to take raw camera files (.dng is the most common format) and apply various changes to it without altering the originals. The entire editing action takes place within the Lightroom environment, so you are never in danger of losing data. You can think of your raw camera files as digital negatives, to be used and reused to create different print files. Lightroom easily stores setting data, allowing you to export as many kinds of derivative files as are needed. However, it is designed around these features. If you want to make actual changes to a master document you'll have to use Photoshop.
Between these two programs we can respond to all kinds of challenges in the Digital Production Unit, organizing and reworking files in the manner best suited to the project.
Written by Ryland Ianelli
Tuesday, September 10, 2013
Petite Papermaking for Conservation Repairs
We recently hosted Renate Mesmer, Head of Conservation at the Folger Shakespeare Library, for a workshop on The Use of the Suction Table in Book and Paper Conservation. Co-sponsored by the Dartmouth College Library Preservation Services and The New England Chapter of the Guild of Book Workers we spent two full days watching demonstrations and trying our hands at flattening, stain reduction, pulpfilling, washing and drying of paper, and paper repairs. Renate provided packets of handouts elaborating on the techniques, and her slide presentation reinforced the concepts with clear diagrams and explanations about the microscopic effects of water on paper. One reference that will be very useful is the book Paper and Water by Irene Brueckle and Gerhard Banik.
The suction table is a new piece of equipment in our lab and will be a very useful tool.

We covered many ways to use a suction table during the workshop, including making paper for repairs. Why make your own paper? Sometimes an item has a lost corner for example. You can attempt to find a match of an appropriate weight and color from your stock of commercial Western handmade papers, or decide to use an Asian paper, but another option is to cast your own paper. This way you can alter the color and weight to match your item. Renate covered a number of ways to do this using the suction table, and one way that uses very little equipment. Since not every conservator has access to a suction table I thought I would explain the basic method of this low-tech papermaking technique.
First take Western handmade paper scraps and tear them up. Soak them overnight in water. I thought I would separate them into their four tones so I could vary the color when making the sheets.

Then take each batch of soaked paper and beat them up in a regular kitchen-style blender.

Once they have been well blended you have a slurry. You want to make sure the slurry is fine enough to eliminate the possibility of lumps in your paper.

Now set up your papermaking station. You will need:
• two large thick sponges (if they are new, make sure you
rinse them thoroughly to get out any soap
or other deposits)
• a set of two
containers the same size (one to hold the pulp, the other will become a tube to
be the “mold & deckle”). Plastic containers work well for this. The size of
the opening is the size of your paper piece, so they must be smaller than your
sponge. Cut off the bottom on one of the containers so you have a tube.
• 2 pieces of Remay cut slightly bigger than your sponge.

Once you have your pulp slurry ready, it is time to make a
sample piece. Measure out a specific amount (such as a teaspoon, tablespoon,
etc.) and make a note of this. Place it into the plastic container (the one with
the bottom) and add water up to the top. Stir this up so the slurry is dispersed.


Pre-wet sponges and wring them out. Wet the Remay also. Then take your two sponges and pile them on top of each other, then the Remay, and then your other plastic container tube on the very top.
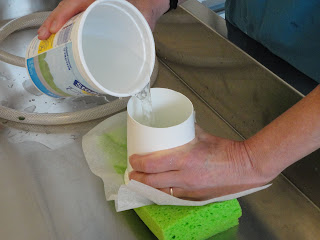

With one hand push down compressing the sponges, with the
other pour the slurry into the tube. Now holding the tube with both hands
slowly release the pressure on the tube, allowing the sponges to release to
their regular thickness. Do this slowly.

The water will seep out the bottom as the pulp is drawn down
onto the Remay. Soon the water will be all gone and the pulp will be
distributed on the Remay forming a petite
sheet of paper. Now carefully remove the plastic tube.


Take the second sheet of Remay and cover the newly formed
paper. You can flatten it through the Remay with a wide bone folder if desired.
Press between blotters and dry.

Once you have dried the sample, you have a basis to
figure out the thickness and color of paper you can make with that slurry. In
other words, that particular amount of slurry (whether a teaspoon, tablespoon,
etc.) using that particular plastic form will create the thickness and color of
that sample you made. By keeping careful notes you should be able to alter the
recipe to adjust these variables to make new paper that closely matches the
item in need of repair. Consider weighing the paper pieces or measuring the
square inches of the paper that goes into the original slurry mixture and noting down the amount of water in the original
slurry mixture. Do not alter the main slurry batch once you have made your sample.
Change the amount of slurry you add to each sheet’s formation to alter the
thickness of the sheet. To change color change proportions of the various
colors of pulp added to each sheet’s formation.
If you prefer you can make a variety of paper pieces to have
in stock for future repairs, rather than making paper for a specific repair.
One other option for this kind of paper casting includes
masking off areas of the Remay under the tube to fit specific areas of loss. Instead
of tearing a paper to fit an edge, you can make a piece of paper with the edge
formed to fit the missing edge. To do this copy the edge you want onto Mylar and cut
that and a matching piece of Remay. Place the formed edge of the Mylar/Remay within
the boundaries of the plastic tube, extending these pieces out from under the
tube. (By cutting these oversized to stick out under the tube they stay in
place.) Continue to make the paper as usual. Once the paper piece is dry, the
Remay and Mylar can be pulled away leaving an edge that fits into area that’s
missing from the original.
Once these paper pieces are made, they can be attached using
conventional practices, such as with wheat starch paste.
The sponge in this technique stands in for the action of the
suction table. With or without a suction table, the idea of casting your own
paper for repairs and losses is a nice option to have in my toolbox of
techniques. Thanks Renate!
Written by Stephanine Wolff
Written by Stephanine Wolff
Tuesday, June 4, 2013
Learn and Practice the Book Arts Over The Summer
During the academic year, the Dartmouth College Library Book Arts Program offers workshops and open studio opportunities that allow for the advancement of skills and knowledge. Most summers we take a break from the full range of opportunities, and this summer is no exception. Our program will only offer a single class: The Letterpress Intensive, but that doesn't mean the learning fun has to stop! Whether you will be in Hanover, back in your hometown, or in a city somewhere around the globe, chances are there is a way to practice the book arts. Here are a few suggestions to expand your knowledge until we are fully open again in the fall, or if you happen to be away from Hanover. Here are suggestions of workshop locations, as well ideas for self-study. There are many more possibilities for learning than what I have mentioned here so I have included some general links to more listings of book arts study opportunities.
If you are looking for others to teach you:
There may be a book arts center where you are going. Multi-week, weekend, and one-day programs can be found through these places, including:
If you are willing to teach yourself:
If you are looking for others to teach you:
There may be a book arts center where you are going. Multi-week, weekend, and one-day programs can be found through these places, including:
- Lovely in the Home Press/Erin Sweeney (NH)
- Book Arts Guild of Vermont (VT)
- Otter Pond Bindery/Susan Bonthron (VT)
- Center for Book Arts (NY)
- Wide Awake Garage/Daniel Kelm (MA)
- North Bennet Street School (MA)
- Wells College Book Arts Summer Institute (NY)
- Morgan Conservatory (OH)
- Columbia College Chicago Center for Book and Paper (IL)
- Minnesota Center for the Book (MN)
- San Francisco Center for the Book (CA)
- London Centre for Book Arts (UK)
If you are willing to teach yourself:
I am a big advocate for self-study. There is so much out there, whether on the Internet or on library shelves, available for free if you take the time to watch or read. Nothing beats hands-on demonstration and practice with a knowledgeable and gifted teacher, but sometimes it is not very practical. So get your Google skills fired up and search the web for those resources. A good place to start is checking out the great information on Peter Verheyen's Book Arts Web. For letterpress printing, try the Boxcar Press's website and their blog,
Ladies of Letterpress, and Briar Press. Some book artists blog about the practical skills that are part of their art practice, including Sarah Bryant of Big Jump Press, Carmencho Arregui, and Jana Pullman.
If you want to learn a particular binding or technique, use both the traditional web search and use an image search. Sometimes we don't have the words to describe what we know visually, so an image search can be useful, as the image can link back to more information. You can also search specifically for tutorials, or just Google your question.
For a link into the community of bookbinding and book arts, check out the Guild of Book Workers and the College Book Arts Association. These organizations offer information and networking opportunities.
Stop in at your local library, whether a small public or large institution, and see what might be on the shelves. Remember that many libraries have inter-library loans and can help you get a title to borrow. Also, your local bookstore may have a volume you want to purchase. The Dartmouth College Library has many books on printing, binding and other book arts that can be checked out, including the Ray Nash Collection, housed in the Current Periodicals Room.
Don't forget you can sign up for our list serv and we will be alert you to any book arts opportunities that arise here at Dartmouth. Check out our webpage and see what's up!
This fall we'll have the addition of our new Book Arts Special Instructor Sarah Smith. She will be in the shop and bindery, with a new line-up of opportunities to learn and practice the book arts. We look forward to seeing you then.
By Stephanie Wolff
For a link into the community of bookbinding and book arts, check out the Guild of Book Workers and the College Book Arts Association. These organizations offer information and networking opportunities.
Stop in at your local library, whether a small public or large institution, and see what might be on the shelves. Remember that many libraries have inter-library loans and can help you get a title to borrow. Also, your local bookstore may have a volume you want to purchase. The Dartmouth College Library has many books on printing, binding and other book arts that can be checked out, including the Ray Nash Collection, housed in the Current Periodicals Room.
Don't forget you can sign up for our list serv and we will be alert you to any book arts opportunities that arise here at Dartmouth. Check out our webpage and see what's up!
This fall we'll have the addition of our new Book Arts Special Instructor Sarah Smith. She will be in the shop and bindery, with a new line-up of opportunities to learn and practice the book arts. We look forward to seeing you then.
By Stephanie Wolff
Saturday, April 20, 2013
Preservation Week -- ALCTS Webinars
Preservation Week, April 21- 27, is an annual event sponsored by the American Library Association to raise awareness of preservation issues and solutions. The Association for Library Collections & Technical Services (ALCTS) is hosting a number of free webinars that week. Here is a roundup of the events:
The Preservation of Family Photographs: Here, There and Everywhere
April 23, 2013
All webinars are one hour in length and begin at 11am Pacific, noon Mountain, 1pm Central, and 2pm Eastern time.
For additional information and access to registration link, please go to the following website: http://www.ala.org/alcts/confevents/upcoming/webinar/pres/042313
Presenter: Debra Hess Norris is Chair of the Art Conservation Department at the University of Delaware, and Professor of Photograph Conservation.
Description: This presentation will offer basic guidance on the care and preservation of family photographs from 19th-century tintypes to contemporary color prints. The webinar will address the fundamental physical and chemical properties of photographic print and negative materials, including albums and scrapbooks, and the causes and mechanisms of their deterioration. Strategies for preservation, such as proper handling, storage and display techniques, will be shared.
Registration Fee: Free but registration is required.
ALCTS thanks Archival Products for sponsoring this webinar and supporting Preservation Week.
-----
Personal Digital Archiving
April 24, 2013
All webinars are one hour in length and begin at 11am Pacific, noon Mountain, 1pm Central, and 2pm Eastern time.
For additional information and access to registration link, please go to the following website http://www.ala.org/alcts/confevents/upcoming/webinar/pres/042413
Presenter: Mike Ashenfelder, Digital Preservation Project Coordinator, has worked for the National Digital Information Infrastructure and Preservation Program at the Library of Congress since 2003. Mike has a Bachelors degree in Music Education from the Berklee College of Music and a Masters in Music History from San Francisco State University.
Increase your understanding of common digital files – digital photos, recordings, video, documents, and others – and learn what it takes to preserve them. Technology changes rapidly. If you don’t actively care for your digital possessions you may lose access to them as some technologies become obsolete. Learn about the nature of the problem and hear about some simple, practical tips and tools to help you preserve your digital stuff.
Registration Fee: Free but registration is required.
ALCTS thanks The MediaPreserve for sponsoring this webinar and supporting Preservation Week
-----
Archival 101: Dealing with Suppliers of Archival Products
April 25, 2013
All webinars are one hour in length and begin at 11am Pacific, noon Mountain, 1pm Central, and 2pm Eastern time.
For additional information and access to the registration link, please go to the following website: http://www.ala.org/alcts/confevents/upcoming/webinar/pres/042513
Do you need to purchase archival supplies for your organization or even yourself? Are you confused by the terminology and not sure about the differences between the various vendors? Not finding exactly what you are looking for and unsure about adapting different products?
Presented by Peter D. Verheyen, Head of Preservation and Conservation at Syracuse University, Archival 101 is designed to demystify the archival product market for the layperson and non-preservation specialist. The presentation will provide an overview of the conservation and preservation issues facing libraries, cultural organizations, and individuals; describe the terminology in use; discuss products and offer buying tips on the different ways these can be used. A list of links to other resources will also be provided.
ALCTS thanks Gaylord for its generous support of this webinar and Preservation Week.
The Preservation of Family Photographs: Here, There and Everywhere
April 23, 2013
All webinars are one hour in length and begin at 11am Pacific, noon Mountain, 1pm Central, and 2pm Eastern time.
For additional information and access to registration link, please go to the following website: http://www.ala.org/alcts/confevents/upcoming/webinar/pres/042313
Presenter: Debra Hess Norris is Chair of the Art Conservation Department at the University of Delaware, and Professor of Photograph Conservation.
Description: This presentation will offer basic guidance on the care and preservation of family photographs from 19th-century tintypes to contemporary color prints. The webinar will address the fundamental physical and chemical properties of photographic print and negative materials, including albums and scrapbooks, and the causes and mechanisms of their deterioration. Strategies for preservation, such as proper handling, storage and display techniques, will be shared.
Registration Fee: Free but registration is required.
ALCTS thanks Archival Products for sponsoring this webinar and supporting Preservation Week.
-----
Personal Digital Archiving
April 24, 2013
All webinars are one hour in length and begin at 11am Pacific, noon Mountain, 1pm Central, and 2pm Eastern time.
For additional information and access to registration link, please go to the following website http://www.ala.org/alcts/confevents/upcoming/webinar/pres/042413
Presenter: Mike Ashenfelder, Digital Preservation Project Coordinator, has worked for the National Digital Information Infrastructure and Preservation Program at the Library of Congress since 2003. Mike has a Bachelors degree in Music Education from the Berklee College of Music and a Masters in Music History from San Francisco State University.
Increase your understanding of common digital files – digital photos, recordings, video, documents, and others – and learn what it takes to preserve them. Technology changes rapidly. If you don’t actively care for your digital possessions you may lose access to them as some technologies become obsolete. Learn about the nature of the problem and hear about some simple, practical tips and tools to help you preserve your digital stuff.
Registration Fee: Free but registration is required.
ALCTS thanks The MediaPreserve for sponsoring this webinar and supporting Preservation Week
-----
Archival 101: Dealing with Suppliers of Archival Products
April 25, 2013
All webinars are one hour in length and begin at 11am Pacific, noon Mountain, 1pm Central, and 2pm Eastern time.
For additional information and access to the registration link, please go to the following website: http://www.ala.org/alcts/confevents/upcoming/webinar/pres/042513
Do you need to purchase archival supplies for your organization or even yourself? Are you confused by the terminology and not sure about the differences between the various vendors? Not finding exactly what you are looking for and unsure about adapting different products?
Presented by Peter D. Verheyen, Head of Preservation and Conservation at Syracuse University, Archival 101 is designed to demystify the archival product market for the layperson and non-preservation specialist. The presentation will provide an overview of the conservation and preservation issues facing libraries, cultural organizations, and individuals; describe the terminology in use; discuss products and offer buying tips on the different ways these can be used. A list of links to other resources will also be provided.
ALCTS thanks Gaylord for its generous support of this webinar and Preservation Week.
Tuesday, January 22, 2013
Book Arts Special Instructor Appointment
I am very happy to announce that Sarah Smith has been appointed the first Book Arts Workshop Special Instructor. Sarah has an MFA in Book Arts and Printmaking from the University of the Arts in Philadelphia and is a skilled letterpress printer and bookbinder. She also has deep experience with student instruction, shop management, and digital printing. Sarah comes to us from Montserrat College of Art and Endicott College where she is currently teaching. In her capacity of Assistant Professor at Montserrat she is Chair of the Book Arts Program and manages Imposition Press. Sarah has also taught at Simmons College and was an assistant book conservator for some time at the Northeast Document Conservation Center.
Sarah's appointment is a significant step in the life of the 23-year-old Book Arts Program, and everyone associated with it are extremely excited. The Special Instructor is a full time, ten-month appointment for three years and is being funded by the Friends of the Dartmouth College Library, the Dartmouth College Library's Cornell Fund, the English Department, and the Associate Dean for Arts & Humanities Office. When Sarah joins us we will be able to increase the number of instruction and studio hours as well as facilitate greater curricular use of the workshop. Sarah will begin her appointment on September 1.
Written by Barbara Sagraves.
Sarah's appointment is a significant step in the life of the 23-year-old Book Arts Program, and everyone associated with it are extremely excited. The Special Instructor is a full time, ten-month appointment for three years and is being funded by the Friends of the Dartmouth College Library, the Dartmouth College Library's Cornell Fund, the English Department, and the Associate Dean for Arts & Humanities Office. When Sarah joins us we will be able to increase the number of instruction and studio hours as well as facilitate greater curricular use of the workshop. Sarah will begin her appointment on September 1.
Written by Barbara Sagraves.
Tuesday, January 15, 2013
Amos Kennedy Visit to Dartmouth

Sponsored by the Office of Institutional Diversity and Equality, Dartmouth College Library and the Friends of the Library.
Amos Kennedy is a letterpress printer using a distinctive voice to create posters, artists’ books, and publications. Through his strong graphics and bold typography, Kennedy pushes issues of race, freedom, and equality, often incorporating proverbs and tales of the Kuba and Yoruba people of Africa, as well as the work of African-American poets such as Paul Laurence Dunbar. Amos quit his corporate job at the age of forty to become, as he calls himself, “a humble negro printer”. He received his MFA from the University of Wisconsin, has taught workshops in over seven countries and is currently spearheading the Detroit Printing Plant.
The Rare Book & Manuscript Library at the University of Illinois at Urbana-Champaign holds a large collection of Amos’s work containing artists' books, postcards, and posters. His work can also be found in many other collections such as Northwestern University and the libraries of New York’s Metropolitan Museum of Art, but Amos will sell you an original letterpress print for just fifteen dollars. “My posters are for everybody,” says Kennedy. He is also the subject of a documentary by Laura Zinger called "Proceed and be Bold.”
Exhibit: Baker Berry Library
Letterpress broadsides by Amos Kennedy reflecting on life, race and injustices. During the month of Janurary there will be an exhibit of Amos Kennedy's posters on display in Berry Main Street.
Event Schedule:
Events will take place in the Book Arts Workshop located in Baker Library, rooms 21-23 (West entrance, lower level, around the corner from the Orozco murals). All events are free and open to the public.
Monday, January 28th
11:00 AM - 1:00 PM Printing demonstration in the Book Arts Workshop hall with the Washington iron hand press.
1:30 PM - 5:00 PM Amos Kennedy will be printing his colorful and unique posters using the Vandercook press. Come by to print your own poster and see what can be done with type. This is a drop in workshop, participants are encouraged to come for an extended time period.
Tuesday, January 29th
1:00 PM - 4:00 PM Amos Kennedy will be printing his colorful and unique posters using the Vandercook press. Come by to print your own poster and see what can be done with type. This is a drop in workshop, participants are encouraged to come for an extended time period.
Wednesday, January 30th
11:00 AM - 2:00 PM Amos Kennedy will be printing his colorful and unique posters using the Vandercook press. Come by to print your own poster and see what can be done with type. This is a drop in workshop, participants are encouraged to come for an extended time period.
7:30 PM Proceed and be Bold: A Film by Laura Zinger. A few years ago independent film maker Laura Zinger made a documentary about Amos. The film covers Amos Kennedy’s background but more than that it addresses issues of race, finding your voice in the modern world, and discovering your passion. Come and see the film and hear a lecture by the man himself. This event is sponsored by the Friends of the Library. Location: Hood Auditorium.
Subscribe to:
Posts (Atom)