Showing posts with label digital production. Show all posts

Tuesday, May 17, 2016

Image Resolution and You

Picking your resolution is perhaps the most important decision you'll make when digitizing photos, artwork, or any other kind of image. But it can also be confusing if you're not familiar with these terms and their meanings. This is a simple primer to help you choose the right resolution for your needs.

The terms DPI and PPI are both shorthand units for measuring an image's resolution. DPI stands for "dots per inch" and PPI, "pixels per inch." This means that DPI is technically a term for a printed object's resolution while PPI describes an image displayed on a screen, but in common use they are essentially interchangeable.

The system that these measurements describe is called Raster, and it's by far the most common in a modern digital setting. A raster image is essentially a mosaic, collecting dots of color called pixels in a tiny square grid to produce an overall image. The more pixels per inch, the more detailed the image. Simple enough, right? For an easy example, here is the same image at three different standard resolutions: 600dpi, 300dpi, and 72dpi (click to see at full size)


You can always lower the resolution of an image, but it's impossible to raise it, except in a simple multiplying sense. This is why all digital images look blurry if you zoom in far enough. You're making the pixels bigger, but you aren't adding any new information to them.

Another factor you will want to consider is your display resolution. Modern high-definition TVs will often give you this basic measurement, and while computers have a greater variety of resolutions they will generally fall under a few typical values. 480p means a screen is 480 pixels wide, and is considered "standard" definition. 720p is, of course, 720 pixels wide, and marks the beginning of "HD" standards. 1080p is probably the most commonly used HD resolution, and the cutting-edge "4K" resolution is a convenient shorthand for screens 3,840 pixels wide. The screen resolution will determine how "large any given image looks at full-resolution on the screen. If you try to stretch a 480p wide image across 1080 pixels, it will look bad.

While the ideas surrounding pixel resolution, display resolution, and print resolution are quite complicated, they can still be understood easily with a few guidelines. For most purposes you can create images using 3 different resolutions:

600ppi is what we at the Dartmouth Digital Library Program use as the standard for high quality "master" images. Although many scanners can go higher, the size of the file becomes very unwieldy at that point. My advice is to always start at at least 600. Better to have a high-quality image and not need it than to need it and not have it.

300ppi is a common resolution for a high-quality print. Unlike looking at a screen where the resolution can be shrunk or blown up, a printer is rigidly limited in the amount of detail it can put into any given area. While a particularly good printer may get higher resolutions, most will clock in around 300dpi. This lower resolution also makes transferring files for print easier. And of course, it's always useful to keep your higher-res files around in case you need to go back to them.

72ppi has become the most common display resolution on the internet. There are a few things to consider before simply converting your image into 72ppi. Look at your display, and understand what its resolution is. Then consider how "big" you want your image to look on the display. So, if you have a 1080p monitor and want an image that fills the whole screen, you'll want to change your ppi to 72, AND change your image width to 1080p at the same time, with the proportions locked.

Here we can see Photoshop's image size menu (Image -> Image Size), where the pixel width and resolution are changed while the proportions remain constrained.

This is often a confusing concept to grasp. The simplest way I can think of is: if you reduce a 300ppi image to 150ppi, but also double its size, it will essentially be the same image when you see it on your computer. But if you try to print that, it will be half as detailed by virtue of being twice as big.

Fortunately, you don't need to fully understand all of this in order to create and work with high-quality images. As long as you make sure your highest-quality 600ppi master versions are safely backed up, you can play around with these variables in Photoshop or any other imaging program until you meet your own needs. Understanding how screen resolution, print resolution, and image resolution work together is an ongoing process that changes with technology as well as peoples' needs. It's important to be consistent, especially so for an institution like ours, but it's equally important to know how to adapt to your own needs.

Written by Ryland Ianelli

Tuesday, March 8, 2016

Digital Production Unit Update

Last fall the Digital Production Unit purchased some photographic equipment to supplement our growing production output.  We have identified a need for more portable camera setup that can also give us the ability to shoot larger items.

The camera equipment includes:
Canon EOS 7D Mark II DSLR Camera (Body Only)
Canon EF-S 60mm f/2.8 Macro USM Lens
Canon Speedlite 600EX-RT Two Flash Wireless Portrait Kit


Other supporting equipment includes:

Oben AC-1451 4-Section Aluminum Tripod with PD-117
Manfrotto Auto Pole- A set of Two Black -1382956
Manfrotto Super Clamp W/Standard Stud -1382900
Manfrotto U Hook Crossbar Holder-1382902P
Manfrotto Telescopic Crossbar
Manfrotto 032BASEB Single Base for Autopole, Black


This setup gives us much more flexibility to shoot in other locations in the library when materials may not be as portable as the camera equipment.  We have also been looking for a way to shoot materials like maps or posters that are too large for the copy stand on our reprographic system.  This will give us a solution to that problem.  As always, if you would like more information about the Digital Production Unit or if you would like to visit Baker Rm.2 and see our setup, please contact Bill Ghezzi or Ryland Ianelli.


Written by Bill Ghezzi


Tuesday, September 15, 2015

Digital Production Roundup

Sometimes great content comes through the Digital Production offices and we don't have a chance to share it. Here are a few of my favorite selections from recent shooting sessions:

"The Flayed Angel" by Jacques Fabien Gautier D'Agoty, available to view in Rauner Special Collections. Read more about it here

A design for a theatrical device by Denis Diderot, co-founder/chief editor/contributor to the Encyclopédie with Jean le Rond d'Alembert

Vintage ad from Dartmouth Alum Robert L. May's scrapbook. May created the Rudolph character in 1939; read more about him here

Concert posters from Dartmouth history, scanned for an exhibit in the Baker Berry Library: Fleshtones concert poster, 1983

Spring Formal poster with Duke Ellington

New Hampshire maps from the Evans Map Room, scanned as part of the Granite State Maps project

Map illustrations

Written by Ryland Ianelli

Monday, April 13, 2015

Merging Images in Photoshop, Part Two

While my first post in this series covered some basics of non-destructive image merging in Adobe Photoshop, this post aims to give you some tools to work with less ideal images.

A typical problem faced by many when attempting to merge images is how to deal with slight variations in your materials. These variations can be a result of the hardware you use (scanner or camera), lighting conditions, software, or a myriad other factors.

In this scenario I'll use an image from a scanned book that has a lighting problem. This is a very common difficulty when scanning books on a flatbed; the book's gutter will raise up from the scanner's surface, giving it a darker tone and distorting the content. Applying pressure to the book may work sometimes, but often we do not want to risk damaging our books (or, worst-case-scenario, our equipment) that way. Much safer to work digitally.


The first step is identifying the cutoff point where the gutter begins to negatively affect image quality. As you can see from this image. As always, make sure you've saved a master version before making any edits. 


Use the Rectangle Marquee tool to isolate the "safe zone" of the page, where the page's content is mostly unaffected by the gutter. Copy this selection and paste it into a new document with approximately the same dimensions as the original document. This is our new "base" document. I will usually put the word "EDIT" in its title somewhere so it won't be mistaken for the master.


In situations like this when we are dealing with an off-white paper, we'll want to make sure our background matches the paper's tone. Use the Eyedropper tool to select the page tone, and use the paint bucket to fill it in the background of the new base document.


What we are going to do next is create an amalgam of the image's two elements (page and background) to create a new version with improved legibility. To accomplish this we are going to use Photoshop's Layer Mask tool. Layer Mask is incredibly useful for photo editing, and best of all it is a non-destructive solution, meaning whatever you do with it can always be easily undone. The Layer Mask is very much what it sounds like: a layer placed on top of each image that can be "masked" or "unmasked," concealing or revealing the image's contents. Select the right side layer and click "Add Layer Mask" at the bottom of the Layer menu. You will now see a small white rectangle linked to that layer; that's your layer mask. The color white means "unmasked," so right now it's simply sitting on top of your original layer waiting for you to give it instructions.


Next, be sure you have the correct layer, AND your layer mask selected, or else you will alter the image itself. The Layer Mask functions in grayscale. Black is "masked," white is "unmasked," and grays are everything in between. Set your foreground color to black. Select the brush tool, and reduce the hardness to 0 (use whatever diameter you feel comfortable with). Check again to make sure you're still on your layer mask, and simply begin lightly touching up the problem spots along the gutter with your brush. Use single clicks rather than click-and-drag, that way you will make very minor adjustments while you get a feel for the technique.


As you can see, we've fixed the page to appear legible and flat. But be warned, this exact method won't work for every situation. If you have content that is deep in the book's gutters, you will likely have to accept a less-than-perfect image. However these techniques can still be used to improve the image quality in those situations, it is simply more difficult to get a "perfect" image. Vary your brush settings and color in the Layer Mask (experiment using a 50% grayscale) to find solutions that best suit your situation.

Written by Ryland Ianelli

Tuesday, December 23, 2014

Merry Christmas and Happy New Year!

Preservation Services, the Digital Production Unit, and the Book Arts Workshop will be closed from December 23 until January 5. 

For your pleasure we offer links to our most popular blog posts in 2014:


Tuesday, December 9, 2014

Merging Images in Photoshop, Part One

One of the most common problems in digitization is how to deal with an image that is too big for your camera or scanner. The simplest solution is to photograph or scan the object in separate pieces, then merge those pieces together, however this can present its own set of problems to those unfamiliar with imaging software.

In this post I will be describing my own method for merging together images. There are many other ways to accomplish these tasks, and if you have a way that works for you, I encourage you to keep using it, but also be aware of its potential pitfalls. The main benefits of my own method are the ability to quality-check your work as you go, and make simple non-destructive edits that can be changed or reversed as needed. Also, for simplicity’s sake, I will be referring to my own Mac OS based workflow for menus and keyboard shortcuts.


Here is the whole image that we’re trying to assemble, and for whatever reason, it’s been captured in two side-by-side pieces in the standard .tiff format. It is crucially important, when capturing, to make sure there is overlap between the captures. This is going to help us check how well-aligned our merging is, so the more overlap the better.

Notice how each side is wider than half of the image

Now that we’ve got our two images, open both in Adobe Photoshop and choose whichever one you want to start working on. I usually go from left to right for simplicity’s sake, so here I will be starting on the left side of the image.

In Photoshop, select the Image drop-down file menu, and select “Canvas Size…” (or use the keyboard shortcut: option+command+C). Click on the canvas width field, and double it. In the “Anchor” field, select the leftmost column of the grid so that Photoshop knows where to put the empty space.


You should be left with an image like this:


It will end up a little wider than is necessary, but it’ll be easier to trim it down after the fact than to add more space. This will now become our “master” file. Do a “Save As” at this point and designate it as such.

Next, go to the second image that we are going to merge into the master (in this case, the right side image). The next step should be familiar to most computer users: select all of the image (command+A), and copy it to the clipboard (command+C). Then go back to the master file and use paste (command+V) to add it into the image.


If you’re paying attention, you’ll obviously notice that this new image is not in the correct position. However, by looking at the Layers panel on the right side of Photoshop you’ll see that the new image is on its own layer, resting on top of the background (if you do not see the Layers panel, select the “Window” drop-down menu and enable “Layers” there). Thus we can edit it without disturbing the original “bottom” layer.


Now, with the top layer selected, click on the “Opacity” field in the Layers panel and set it to 40%. This will make the top layer semi-transparent and allow us to line it up with the bottom layer.

Then, with the Move tool selected (V), begin moving the top layer around and trying to find where it lines up. Look for any solid shapes that are shared by both images, or where the borders intersect. Letterforms provide nice clear and easily-spottable shapes, which is why I have used them in this example, but it can be anything so long as it’s shared by both images.


We’re getting there, but it’s obviously still not right. At this point, find an area of overlap and zoom in closely. Then, with both the top layer and the move tool selected, simply “nudge” the top layer into place using the arrow keys. The arrow keys will only move the layer one pixel at a time, so obviously this is for the finest level of adjustments.

Almost...

Nailed it!

Now for the final steps! In the layers panel, set the top layer’s opacity back to 100%. Then inspect the images along the borders, making sure that it looks seamless. While checking for quality be sure to zoom in and out.


At this point you can crop the image down to its original size, and it will be ready to go. However, one important piece to remember is that layered .tiffs, in addition to simply being larger files, are also not commonly supported by web or other software. What I like to do at this point is to save the “Master” file with both layers, and then create a new version for common use. The common use version will get flattened (Layer -> Flatten Image) then do a Save As in whatever format is required such as .jpeg or .pdf. This way, if any changes need to be made, we can always go back to the Master version.

And there you have it! A nice, seamless image. In the next post in this series, I will go into more detail for dealing with other problems, such as skew and mismatched backgrounds or details.

Written by Ryland Ianelli

Tuesday, October 14, 2014

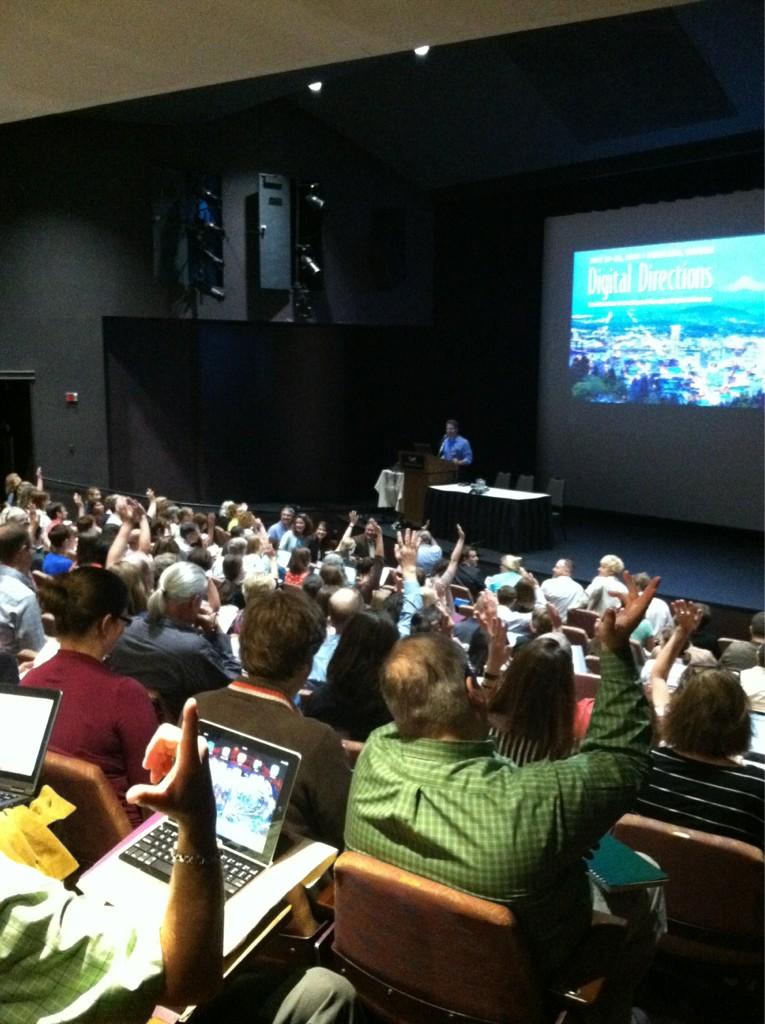
Dartmouth at the Digital Directions 2014 Conference

Image from the blog PDXretro.com

This past July I had the great opportunity to attend the Northeast Document Conservation Center’s Digital Directions 2014 conference. In a lucky turn, this year’s conference was held in Portland, Oregon, home of my alma mater, Reed College. In addition to reexperiencing the highlights of one of my favorite American cities, I was able to meet and engage with many people doing amazing work in digital collections across the country and beyond.


The conference covered a fascinating diversity of topics, from high-level project management and planning to specific examples of workflows and equipment setups. One of the first things impressed upon me was the fascinating diversity of digitization efforts occurring across the world. As the demand for digital content continues to expand, many institutions are rushing to fill that need. Because of this, it can often seem that no two institutions’ digital programs are the same, or even particularly similar.

To its credit, the Digital Directions did a phenomenal job accounting for these various setups. The three days were jam-packed with a fascinating variety of discussion topics and presentations. The first day consisted of mostly big-picture type talks. We discussed the interplay between digital preservation (maintenance of access to digital content) and digital curation (adding value to digital content), as well as how to craft each institution’s best practices and standards according to their needs. The day was wrapped up with an impressively no-nonsense discussion about rights and responsibilities from a legal perspective by Peter Hirtle, followed by a lovely meet-and-greet at the Portland Art Museum.

The following days covered a wide variety of topics, including a fascinating section about audio and video digitization (an area unfortunately outside my range of experience). However, it soon became apparent that the challenges faced by those audio and video digitization teams were remarkably similar to my own in the world of object and document reproduction. Many digitization projects face the same fundamental roadblocks: time, equipment, resources, access, and storage.
Image from NEDCC's twitter account

While the specifics varied, these fundamental issues could not help but make themselves apparent. The relative merits of, say, cloud storage (to pick a random example), can be endlessly debated among digital librarians, and indeed I’d doubt there ever will be a definitive final-word on this topic. But the crucial takeaway must be a willingness to engage with these issues, understanding the risks and drawbacks inherent in each option so that they can be minimized, or at the very least understood fully so that we may deal with them more effectively in the future. Among the many useful things I learned at Digital Directions 2014, perhaps the most important one was that my own peers are an incredible resource, both within Dartmouth and world-wide. By learning through their experiences and sharing my own, I hope to do my part to keep the Dartmouth Library’s Digital Collection growing and improving well into the future.

Written by Ryland Ianelli

Tuesday, September 30, 2014

100-ish Days of Digital Preservation

Hello, there. It's been a little over 100 days since I started as Dartmouth College Library's first Digital Preservation Librarian. I've been working closely with staff in many departments to define my role and work out how best to ensure long term access to the Library's digital content. Here are some of the things that I've been up to:

  • Maxed out our master file server space.
  • Learned about awesome projects and connected with colleagues at Digital Preservation 2014.
  • Made some head-way into assessing our e-resource preservation strategies.
  • Used BagIt to package 45,000 files totaling 2413 GB for long-term storage (see above re: maxing out server space).
  • Started digging into PREMIS .
  • Learned to harness the power of Twitter for professional research #digipres .
  • Started brainstorming strategies for preserving analog and born-digital a/v content.
  • Dipped my toes into web and database preservation in response to a faculty inquiry.
  • Got really excited about sustainability and digital humanities projects.
Digital Preservation Brainstorming!

 I’m looking forward to my role in the Library continuing to evolve and grow over time. As these and other projects develop, I will tell you all about them here. Stay tuned for the next 100-ish days of Digital Preservation!


Written by Jennifer Mullins

Tuesday, June 24, 2014

Digital Production Unit Update, Part 2


The primary focus of the Digital Production Unit over the past few months has been to incorporate the new reprographic system into our workflows. Since we started using the new equipment in January we have been able to take advantage of its speed and high quality imaging in a number of projects. 


We have redesigned our workflow for the Dartmouth College Photographic Files collection to use the new camera exclusively. The previous workflow for this ongoing project used two scanners on two computers and required additional post production work to gather all of the images together. Our new workflow consolidates all of that work onto one workstation. The streamlined workflow has created noticeable positive effects in the time it takes to complete work on this project.

Dartmouth College Photographic Files collection: (http://libarchive.dartmouth.edu/cdm/search/collection/photofiles/collection)

One of the first projects we tackled with the new equipment was to shoot recent Winter Carnival Posters. This was a great learning opportunity for us. The posters are large and colorful and gave us a chance to develop our skills with the hardware and software. We will add individual new posters as they become available in future Winter terms. In addition, we are in the planning stages of a project to reshoot all of the posters to upgrade the quality of our master images.


We have also been able to use the equipment in support of smaller projects in Rauner Special Collections and for exhibits by Education and Outreach. Other work with the camera includes one-offs for various projects, quality assurance and corrections.


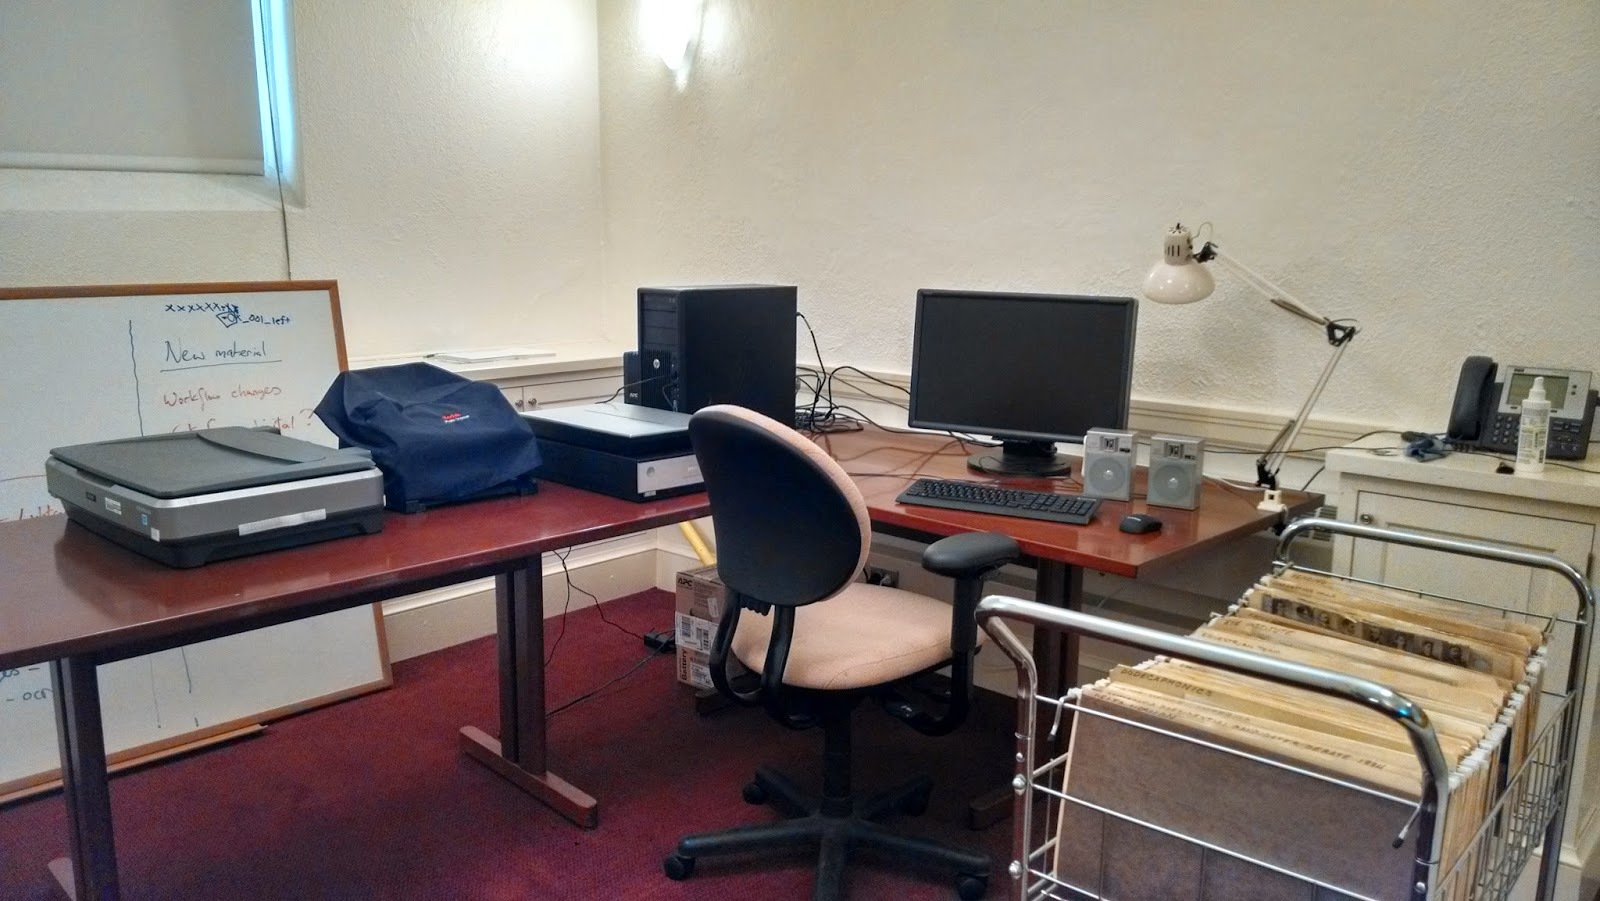
In other news, we continue to redesign our work area. We recently moved all of the scanning equipment into room 2D, turning that space into our scanning lab.

By Willliam B. Ghezzi

Tuesday, January 7, 2014

Big Plans in Digital Production

Something exciting is brewing in the depths of Baker-Berry! 

New workstations, and mysterious boxes have been arriving steadily. 


Stay tuned for future updates from the Digital Production Unit!


Written by Ryland Ianelli

Tuesday, October 8, 2013

Manage Your Photos with Adobe's Bridge and Lightroom

If you decide to digitize a collection of images, such as a photo album or a slideshow, there are literally thousands of different software solutions to go about organizing them. Many of these can come bundled with scanning or photo software, and often those can offer a relatively low-cost and hassle-free solution to keeping track of your images.

However, if you want to ensure the maximum compatibility and usability of your images over the long term, there are more advanced options available through Adobe's very popular line of professional software. The complete Creative Suite (and the newly-offered Creative Cloud) feature an almost overwhelming amount of tools, from film editing to website design, along with the nigh-essential Photoshop.

Two of these programs are designed for the main purpose of organizing and viewing large collections of images; something you might imagine is essential to the kinds of digitization projects taken on by the Dartmouth College Library's Digital Production Unit. Adobe Bridge and Adobe Lightroom each offer distinct advantages over the other, and while they may share some purposes, it can save you a lot of time to know which one suits your project best.

Adobe Bridge is, as its name implies, an excellent way to organize many different kinds of media, "bridging" many formats. It is designed to play nicely with all other Adobe programs, and offers an excellent alternative to the standard Mac OS Finder, or Windows Explorer when it comes to browsing collections. The interface can be altered modularly to suit a project, meaning you can re-size, add or delete tools from the main screen with great ease. Additionally, you can add or alter image metadata, and do batch file renaming. Its flexibility is its best selling point, making it a helpful addition to any Adobe-based workflow.

Lightroom, on the other hand, is designed specifically for photographs. In addition to letting users browse through collections of photographs, Lightoom offers far more tools for photo-editing than Bridge, and presents them in a way that is familiar for professional or amateur photographers. While at first blush this would appear similar to running a combination of Bridge and Photoshop, it actually has a few interesting tricks of its own.

The most important thing about Lightroom is to think of it within the context of a photographer's studio. The program is designed to take raw camera files (.dng is the most common format) and apply various changes to it without altering the originals. The entire editing action takes place within the Lightroom environment, so you are never in danger of losing data. You can think of your raw camera files as digital negatives, to be used and reused to create different print files. Lightroom easily stores setting data, allowing you to export as many kinds of derivative files as are needed. However, it is designed around these features. If you want to make actual changes to a master document you'll have to use Photoshop.

Between these two programs we can respond to all kinds of challenges in the Digital Production Unit, organizing and reworking files in the manner best suited to the project.

Written by Ryland Ianelli 

Tuesday, July 30, 2013

Slide Scanning Tips

When I was an undergraduate student I worked in my college library’s Visual Resource Collection in a somewhat similar position to the one I’m in now. The VRC was primarily a resource for my school’s Art History Department (my major), and their main asset was row upon row of metal filing cabinets filled to the brim with 35mm slides.

As the years went on, we unsurprisingly saw more and more art history professors moving towards digital teaching tools. As such, the VRC department had no choice but to move with the times and focus on the digitization of their existing collection.

This was my first experience scanning 35mm slides, and while it fundamentally follows the same principles as scanning anything else, there are some considerations to be made. The main question is one of scanner preference: mechanical feed or flatbed?

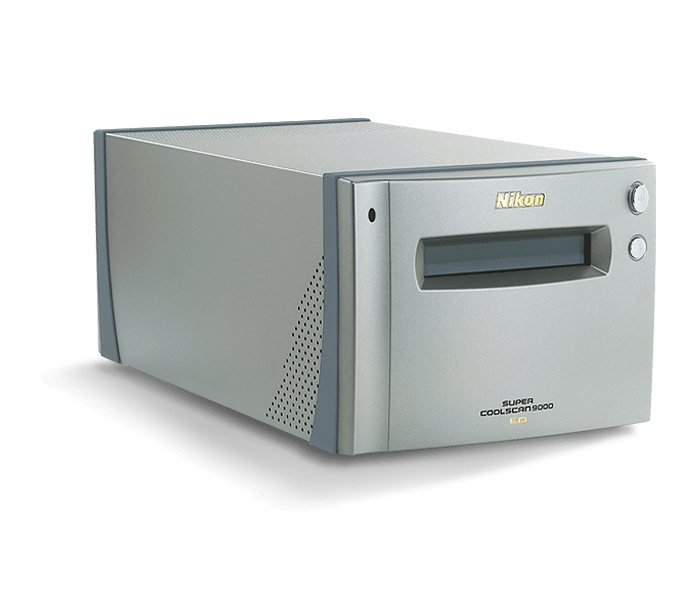
Nikon Super COOLSCAN 9000 ED; a professional-quality mechanical feed slide and negative scanner I used at my previous job. Image copyright Nikon USA.

Mechanical feed slide scanners have several distinct advantages: they are smaller and very easily portable; they are often designed to accept large batches of scans in a workflow environment; and they require very little adjustment or calibration on the user end. However, there are drawbacks as well. Much like the mechanical feed photo scanner, it is prone to dust. This dust is significantly more troublesome in the final product due to the small size of the originals. Additionally, the user-friendliness can sometimes translate to poor customizability. And of course, the slide scanner’s utility is limited to 35mm slides or film negatives.

The Epson Expression 10000XL, with transparency unit and slides ready for scanning

While flatbed scanners are designed with larger printed material in mind, often times these too can accept slides or photo negatives with certain peripheral attachments. In the Dartmouth Library Digital Production Unit, our Epson Expression 10000XL flatbed scanner has such attachments. The biggest and most crucial is the transparency unit. This piece replaces the original scanner cover with what is essentially a lightbox, backlighting the slides and providing consistent illumination. Additionally, there are slide and negative holders that help keep your images consistent.

The biggest drawback to the flatbed scanner is that sometimes the scanner itself has not been designed for the high-resolution settings required to scan such small objects at archival quality. Usually a good resolution for 35mm slides is 2,400 dpi; four times the resolution of our usual scans. A good high-quality scanner should have no problem with this, but many consumer-level scanners simply can’t scan a resolution that high.

While our Digital Production Department has not had much reason to incorporate slide and negative scanning into our workflow thusfar, it can’t hurt to be prepared for whatever digitization projects come our way.

Tuesday, June 18, 2013

Personnel Announcement: Preservation Services and Cataloging and Metadata Services

We are pleased to announce a change in Bill Ghezzi’s role and job assignment in the Library.  Effective immediately, Bill’s new title is Digital Production and Metadata Librarian.  Bill reports half-time to Barb Sagraves and half-time to Cecilia Tittemore.  This change represents a significant increase in Bill’s focus on work to support the Digital Library Program.

Since September 2012 Bill has been participating in a pilot project with a half-time assignment as Digital Production Manager in Preservation Services, and a half-time assignment as Cataloging and Metadata Services Librarian in Cataloging and Metadata Services.  Working together with Bill, we have assessed the impact of the pilot and determined that this division of Bill’s time, combined with his unique skill set, will help the Library move forward in fulfilling the ambitions of the Dartmouth Digital Library.  With this announcement, the pilot period draws to a successful close.

During the pilot Bill took over management of existing Digital Production Unit workflows including the complex Occom Circle Project, the long-term Photo Files Project, and has been responsible from the start for the Donella Meadows Project.  Bill has maintained his membership in the Digital Projects and Infrastructure Group (DPIG) and contributes his expertise as a cataloger and production manager to project planning and infrastructure development.  In the area of digital preservation Bill has been collaborating with Barb and Paul Merchant to develop a protocol for depositing masters and derivatives on the server for long-term storage.  Bill has worked with Ryland Ianelli and Barb Sagraves to ensure uniform application of digitization standards from project start-up.
This new position also includes an increased focus on defining standards and practices for metadata for Dartmouth Digital Library content, including local policies for object identifiers, and for ongoing management of library metadata.

Our thanks go to Bill for recognizing an opportunity for deep collaboration between our departments as the Digital Production Unit began to take shape, and we are extremely grateful to him for proposing this plan and seeing it through to a successful outcome.  Cataloging and Metadata Services will be making adjustments to assignments and priorities over the next few months to help support this important collaboration.  This change, together with the initiation in 2010 of the Text Markup Unit, managed by Mina Rakhra, represents significant support from Cataloging and Metadata Services for the work of the Dartmouth Digital Library. 

Cecilia P. Tittemore, Head, Cataloging and Metadata Services
Barb Sagraves, Head, Preservation Services  

Tuesday, April 16, 2013

Dust in the Machine

In the last year since the Digital Production Unit was added to Preservation Services we've grown and adapted to many challenges. One of our most resource-heavy projects is the Dartmouth Photo Files, a project to scan and collect the college's photographic records currently being held in Rauner Special Collections Library. So far we've scanned and uploaded nearly 8,500 photographs; merely one-tenth of the estimated total. We realized quite early that a project of this scope and type has different requirements than the smaller projects we regularly take on. This post will address the recurring issue of dust in the scanner.

While flatbed scanners like our Epson Expression 10000XL merely require the occasional spritz of glass-cleaner to maintain, our feed scanner, the Kodak PS810, is far more demanding due to its complicated internal mechanism and heavy amount of use. A piece of dust on a flatbed scanner is quite difficult to notice, and usually does not produce an unusable result (at the very worst it will catch the reflection of the scanner's lamps and discolor a few pixels). However a piece of dust inside the feed scanner will leave a quite noticeable mark on the image in the form of a colored (usually green) streak across the image. This happens when a piece of dust is trapped on the scanner lamps and the image is dragged over it, producing a line, like this:


Dealing with this dust starts at the beginning of every scanning session. Every day we use it the Kodak PS810 (as well as its surrounding area) is thoroughly cleaned. The feed rollers are wiped free of dust and the lamps are cleaned off with special polishing wipes. At the end of this process a "transport cleaning sheet" is fed through the scanner; this sheet has a sticky surface and is designed to pick up the last stray bits of dust. Afterwards the machine is ready to scan.

However, dust does not simply stay out of places that have been cleaned once, and in the Photo Files project we found that many of the photos themselves are responsible for dragging dust into the scanner's inner workings. In most cases where this occurs the dust stays on the lamp for several photos until it is dragged off, producing a sequence of photos all with the same green line across them. Needless to say, this is problematic for our finished product.

After attempting a few solutions to this problem, the best one we came up with was a spot-dusting of every photo before it goes through the scanner using a squeeze-duster like this:


While the procedure isn't perfect, it does lower instances of this problem drastically. Remaining dusty images are caught during our quality-assurance step and rescanned. Some photo scanning software claims to be able to remove this effect through digital manipulation (including Kodak's own software, which we do not use), however we chose not to adopt this in our procedures in order to maintain the integrity of the original, unaltered image. The result of such process is as claimed, removing the green dust lines, however it accomplishes by distorting the parts of the image directly above and below the dust, creating a blurred effect that is noticeable upon close inspection. While this is probably a good solution for a hobbyist, we intend to ensure the best possible condition for our scans in the long run. In this case the old saying holds true: a pinch of prevention saves a pound of cure, and by ensuring best practices at the scanning phase we can drastically reduce the need for rescans.

Written by Ryland Ianelli.

Tuesday, December 4, 2012

Digital Production: Tools of the Trade

Today I'd like to highlight the Digital Production Unit, a cozy corner of Baker Library where we, along with the crucial help of many other library departments and staff, help to bring digital content to the Dartmouth community.

Baker 02: where the magic happens

Any good workshop needs the right tools for the job, and ours is no different. As I mentioned in my post about Optical Character Recognition, the Digital Production Unit deals with a very wide variety of library materials, from 18th century manuscripts to an audio lecture by J. Robert Oppenheimer and related materials. It is a simple fact that Dartmouth Library's Special Collections have a fantastic variety of useful scholarly objects, and it behooves us to be as versatile and efficient as possible in bringing these into digital space.

Scanning workstations

Our most commonly used pieces of equipment are our two flatbed scanners: the Epson Perfection V750-Pro and the Epson Expression 10000XL.

Epson Perfection V750-Pro

The Perfection V750 is an excellent consumer-level machine. It's small, relatively inexpensive, and perfectly able to create high quality images up to our standards. Most importantly, this scanner has a considerable speed advantage when compared to...

...the Epson Expression 10000XL

The Epson Expression XL is, first and foremost, a significant upgrade from the Perfection in terms of scanning area, which is over twice as large as the Perfection's. It is also a very versatile machine, with attachments for scanning photographic negatives in addition to the usual capabilities. In terms of scanning quality the two Epson scanners are roughly equal, however, due to the Expression's larger scan area, it has a significantly slower scanning speed, which can become problematic on time-sensitive items.

Kodak PS810

The other crucial piece of equipment in our lab is the Kodak Picture Saving Scanner System PS810. This scanner has a much more specific function than the Epsons. Its strength is speed; the feed tray can pull through and scan several photos per-minute, indeed, hundreds in a single operation. This is incredibly useful in dealing with our biggest project yet: the Dartmouth Photographic Files, an impressively large collection spanning back to the very beginnings of the College's photographic records.

While this scanner excels at scanning many documents quickly, it is even more limited in scanning area than the Epson Perfection. Not only that, but items must be under a certain thickness in order to pass through the feed safely. Additionally, it can only scan at 24-bit color (as opposed to the Epson scanners' 48-bit colors), which renders it ineligible for many projects. While these drawbacks make it somewhat limited in applications, it performs very well when properly maintained (our procedures have it cleaned daily, and sometimes more often than that).

In addition to the equipment in Baker 02, we also have been known to occasionally borrow other library resources in accomplishing our goals.

The Indus Color Book Scanner 5002

This overhead-style scanner is exceptional for scanning entire books, as its adjustable platform can accommodate different-sized spines. Another advantage is speed; this scanner works similar to a camera, snapping a single digital picture and transferring it to the computer. The biggest disadvantage is image quality; like the Kodak scanner, its limited to 24-bit color.

The Vidar HD4230

Finally, for oversize documents we've had occasion to coordinate with the Evans Map Room and make use of their feed-scanner, the Vidar HD4230. This scanner creates very high quality images by feeding larger documents through it, rather than passing lamps over stationary documents, like a flatbed scanner does. The speed of scanning is relatively slow, and must be done carefully to insure the document's safety. However, for many projects such as the Sanborn Fire Insurance Maps of New Hampshire, this scanner is the only option to ensure the quality of images over a certain size.

Using these tools, and with the invaluable support of many library staff, we've been able to adapt to the myriad challenges in Digital Production. Personally, I look forward to what further challenges await.
Written by Ryland Ianelli.