Showing posts with label techniques. Show all posts

Tuesday, August 4, 2015

Lifelong Learning

Stephanie Wolff, Assistant Conservator, leaves Dartmouth as of July 31.  We will miss our colleague and friend but before she left she gifted us all with a final (and as always with Stephanie) educational blog post.

Farewell Stephanie! Don't be a stranger!

As I’ve worked in the fields of bookbinding and conservation colleagues have been generous in sharing knowledge and techniques. Not only in person, through conferences, workshops, and conversations, but by way of handouts, journal articles, blog posts, and videos. Over the years I have collected these kinds of resources (books included) to further my skills and knowledge. They range from websites to photocopies to simple drawn diagrams and sketches I’ve made while at an exhibition. These collected resources help expand my knowledge and allow me to try new techniques on my own.

While working here in the conservation lab at Dartmouth I gathered a notebook full of helpful techniques and other book and conservation resources. Here I’ve listed some of the ones that are available online in hopes they may prove useful to others as well. Included is a link to Peter Verheyen’s wonderful bookbinding bibliography for even more resources.

To all those who have shares their knowledge so generously, thank you.


The Guild of Book Workers - Go to Resources, then Handouts to find a variety of wonderful material, including the ones listed here.

Anderson, Jennifer. “Cloth Covered Book Cradles.” Abbey Newsletter. Volume 17, Number 7, December 1993.

Baird, Brian and Mick Letourneaux. “Treatment 305: A Collections Conservation Approach to Rebinding.” The Book and Paper Group Annual. AIC. Volume Thirteen, 1994.

Barrios, Pamela. “A Method for Reblocking Modern Books.” The Bonefolder. Volume 4, Number 1, Fall 2007. p. 35.

Cullhed, Per. “The 5-Minute Phase Box.” The Abbey Newsletter. Volume 24, Number 2, October 2000.

Eldridge, Betsy Palmer. Stitches and Sewings for Bookbinding Structures. GBW and CBBAG, 2008.

Espinosa, Robert and Pamela Barrios. “Joint Tacketing: A Method of Board Reattachment.” The Book and Paper Group Annual. AIC. Volume Ten, 1991.

Etherington, Don. “Japanese Paper Hinge Repair for Loose Boards on Leather Books.” Abbey Newsletter. Volume 19, Number 3, August 1995.

Kellar, Scott. “The Inserted Flange Case Binding Structure for Rebinding Heavy Folios Without Leather.” The Abbey Newsletter. Volume 7, Number 6, Dec 1983.

Kellar, Scott. “The Laced Limp Paper Binding.” The Abbey Newsletter. Volume 6, Number 1, Feb 1982.

Krupp, Andrea. “The Library Company’s Corrugated Clamshell Box.” The Abbey Newsletter. Volume 15, Number 6, October 1991.

Kyle, Hedi. Handout from the presentation: Wunderkabinette: Architectural Book Environments (includes Preservation Enclosures: Wrappers, Boxes, Slipcases, Folders, as well as other inventive structures), 2005.

Minter, William. “Spiral Bindings in Hardcover: An Alternative to Rebinding.” The Abbey Newsletter. Volume 21, Number 5, 1997.

Rebsamen, Werner. “Gebrochener Ruecken (Shaped Spine Case-Binding Techniques).” The Abbey Newsletter. Volume 11 Number 3, April 1987.

Smith, Wendy. “The Ferguson Slipcase.” The Abbey Newsletter. Volume 13, Number 5, September 1989.

Syracuse University Libraries: Department of Special Collections, Conservation Lab Treatment Manual Series. Information on Conservation Recase, Molded Paper Spine Binding, Paper Spine for Thin Volumes, Phase Boxes, Corrugated Board Clamshell Box 

Verheyen, Peter D. German Case (Bradel) Binding, Originally published 2002, re-written with new illustrations 2006. Published in Skin Deep, Volume 22 - Fall 2006.

Verheyen, Peter D. Bookbinding Bibliography.

Written by Stephanie Wolff


Tuesday, May 26, 2015

Illustration with a Knife

Recently I taught a class in our Book Arts Workshop on basic papercutting. This historic technique has many artistic possibilities. The resulting cut paper piece can be a finished artwork or used as a matrix for stenciling. Here is one approach you can try to begin cutting paper.

Step One:

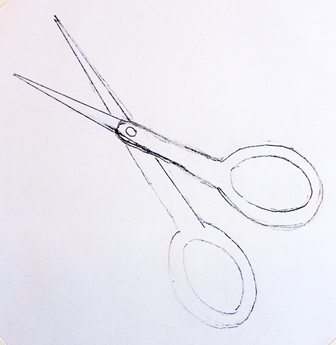
Find or draw an image. Simplify your design, as this technique is easier, yet still effective, with basic shapes suggesting the represented item. You just need to provide your viewer with enough information to understand or identify the picture. Print or draw the image on a piece of photocopy or other thin paper at its final size.

Step Two:


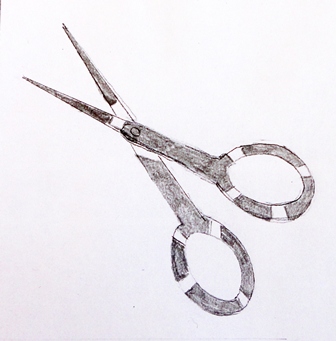
Determine the cuts. At this point, you want to decide if your final cut paper design will be adhered to another background paper. If so, then you could let any counters (this is the typographic term for the interior of a letter, like the middle of an “O”) drop out because you can glue them down to the background paper. If the cut paper design will be used as it is (as an independent page or as a stencil) then you will need to make sure there are “bridges” to hold any counters in place (as shown here in the handle of the scissors). On your pattern darken the areas you wish to cut away, making sure you have enough paper left behind to keep the image stable once cut.

At this point you are still determining your final design, because the illustration and the paper’s structure are so interrelated. You will probably want to have some visual interest and dimension to your image. For instance, if cutting an apple shape, perhaps do something other than merely cutting out a slightly circular shape with a stem. Consider using a combination of thin lines, or ways to create your design with multiple smaller shapes or cuts, or suggesting light and shadow.

Step Three:

Once you have determined your cuts, tape the pattern down onto your final paper. I am using a 70lb black text weight paper, which cuts nicely but is still pretty stable. You’ll want both these papers to be oversized if possible, so the tape doesn't make any unwanted marks on your paper.

If you have a small self-healing cutting mat, tape the finished paper down to it. My 6” x 8” gray mat works well here because I can tape the papers to the mat and easily move them all together while cutting. If you only have a large cutting mat, don’t tape the papers down to the mat because it will be cumbersome to move the mat as you cut. Just move the paper. You can experiment and see what works best for you.

Step Four:

Prepare your knife. I like to use a knife with a pointed tip, such as a scalpel with a 23 or 25 blade, or an X-Acto with a number 11 blade, but a snap-off Olfa or hardware store knife works too. No matter what kind of knife you use, a very sharp blade makes cutting paper easier and safer. So start with a fresh blade and replace it as soon as you notice it moves through the paper with more resistance than when you began.

Step Five:

With all knife cutting, I suggest using the knife at a perpendicular angle to your body, in other words bringing the knife from top to bottom vertically to make the cut. Keep your “helping hand” away from the knife, either above or beside the action of the blade. Move the paper (and mat) to orient it so that you can cut in this manner, and keep moving the paper as needed to maintain this position. Not only will your body feel better after an hour of cutting, but you will have more control by using the knife this way.

Don’t hold your knife with too tight a grip. Try to keep your hand as relaxed as possible while cutting. Find a good balance between your knife’s position in the hand and maintaining enough pressure on the knife to make good cuts.

To begin cutting, remove the small pieces first. This keeps the paper stable for a longer period of time and helps retain the overall integrity of the larger sheet as paper is removed.

When cutting a straight line, use a straight edge (like a ruler) to guide your knife if possible. This helps make an even clean line as you cut.

At the point where two lines meet, cut from that point outward. In my example I would cut from the tip of the scissors towards the handle. This helps avoid overcutting past the point of intersection.

When cutting an arc or any circular shape, try moving the paper with the knife as you cut. Making many small cuts smoothly as your knife turns along the curved line can alleviate jagged edges. These can also be carefully trimmed later if not smooth enough.

Remember you are cutting through two sheets of paper: a pattern and the final paper. It’s best if you get through both layers with the first cut. You want to avoid cutting twice in the same spot. Rough edges and corners can be cleaned up later, but be careful not to pull on pieces too much when removing them in case any are still attached. Keep in mind that if the pattern isn't cut through and you have to pull to remove a pattern piece, then of course the paper underneath isn't cut through either.

Practice! The more you cut the better you get at it (like most things). I have a book artist friend who starts his day in the studio with some practice cutting before moving on to his artwork. He uses a lot of papercutting in his work and he’s really good at it, but he’s always working on his skills.

Step Six:

Once you've cut out your design remove the pattern and clean up any edges and corners as needed. As you do these additional small cuts, continue to cut while the paper is on the self-healing mat. Use the tip of your knife to trim away any excess paper uncut in the corner, remembering to cut from the corner outwards. A pair of scissors (especially curved blade nail scissors) can be useful to help smooth out any curved shapes if you can fit the blade into the area that needs trimming. If using scissors, of course pick up the paper to make those cuts.


Design cut with "bridges".

Design cut without "bridges" where counters drop out.


There are many resources for the art of cutting paper:

Contemporary artists using cut paper as their main medium include Beatrice Coron and Rob Ryan.

Henri Matisse also used cut paper in his work, often only using scissors, as a recent exhibition at the Museum of Modern Art highlighted.

Traditional German papercutting called Scherenschnitte is another technique to explore to learn other methods of papercutting.

Two recent books available in the Dartmouth College Library that include a gallery of papercutting are:

Gildersleeve, Owen. Paper Cut: An Exploration Into The Contemporary World Of Papercraft Art And Illustration. Beverly, MA: Rockport Publishers, 2014

Slash: Paper Under The Knife. New York: Harry N. Abrams, 2009.


Written by Stephanie Wolff