The most important difference between scanning negatives and positives is that negatives require backlighting in some form or another. While there is some flexibility in how you achieve this, it's always a requirement. Here I'll examine three methods of capturing negatives, and their respective advantages and disadvantages.
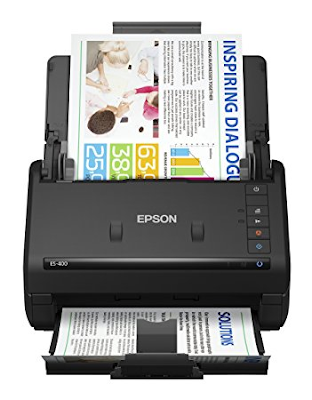
Method 1: Feed Scanner
 |
| Pictured: Epson Workforce ES-400 |
The biggest disadvantages to a feed scanner are its lack of flexibility, its rough treatment of the item, and its tendency to attract dust in its interior. Many such scanners require a proprietary software to capture images, which can vary quite a bit in quality and flexibility (an upside to this is the software can sometimes be more user-friendly than programs such as Capture One). The rollers these scanners use to pull the object through can easily be damaging to a fragile object such as a brittle older negative. And finally, you'll want to clean and dust the inside of your feed scanner regularly to prevent streaks across your images.
Method 2: Flatbed Scanner with Backlight
 |
| Epson Expression V700 |
Flatbed scanners are what we commonly picture as a "scanner," but not all are able to handle photo negatives. Be sure to check the model's description and make sure that it's equipped for the job. For the Epson Expression V700 model we have at the Digital Production Lab, the top panel can be detached and reattached for normal or backlit scanning.
The advantages to a flatbed scanner are its flexibility and consistency. It will need precious little cleaning or calibration, and it is compatible with many different kinds of scanning software. The biggest drawback is the speed; it's the slowest of the three options and requires a good bit of hands-on fiddling, especially if you opt to use negative holders to keep your items in place. They are optional, but often helpful. All the tips provided here for slide scanning also apply to photo negatives.
Method 3: Camera with Lightbox
 |
| The Dartmouth Digital Production camera and lightbox |
However, the drawbacks of this method are significant. You must be ready to setup automated editing of the images (or be ready to tediously edit each individual image). You must also recalibrate your lighting setup to accommodate the backlighting of the lightbox, including refocusing your lens and checking your color balance. Often this also requires turning off your camera's flash and lowering your shutter speed. However, if you have the equipment and inclination to do it, the camera/lightbox setup will give you the greatest control over your finished product, and once the setup is complete the images can be captured very quickly.
Whatever equipment you use for your negative scanning project, it's important to know what problems you might come across and prepare for them as best you can.
Written by Ryland Ianelli

No comments:
Post a Comment