
In my conservation work I often repair loose boards using the Japanese Tissue Board Reattachment method devised by Don Etherington. I also use Japanese tissue to cover a board tacket at the repaired hinge. Moriki is the Japanese tissue generally used for both repairs, and while it comes in a variety of colors, for the most part these colors do not match the (often) irregular color of the damaged book’s leather. In an effort to make the repair visually disappear, I tone and mark the paper prior to its application on the book.
I approach the toning in two ways—coloring a smaller piece of paper designed for an individual book, as well as toning larger pieces as “stock” for future repairs. The toning of these “stock” pieces creates a basis for additional alteration in color or visual texture as needed for a particular volume. This is how I color Japanese tissue:
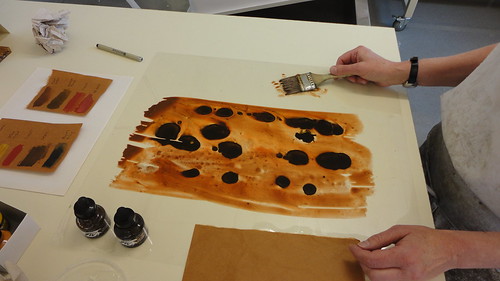
I start with a generous piece (oversized for the particular repair or large enough for multiple future repairs) of moriki Japanese tissue in a base color, usually a mid-range brown. I cut a piece of Mylar larger than the paper as a work surface. Using FW acrylic inks, I drop small puddles on the surface of the Mylar, creating spots of a variety of colors over the area where my paper will go. Some basic colors we use in the lab include: burnt umber, antelope brown, red earth, sepia, and Payne’s gray.
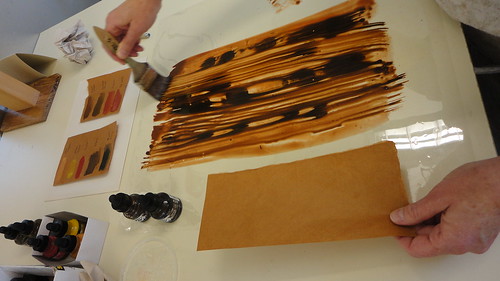
Once enough of these puddles are on the Mylar, I use a wet brush to blend them, brushing in vertical strokes, taking care to maintain the variation in ink color and avoid uniformity.
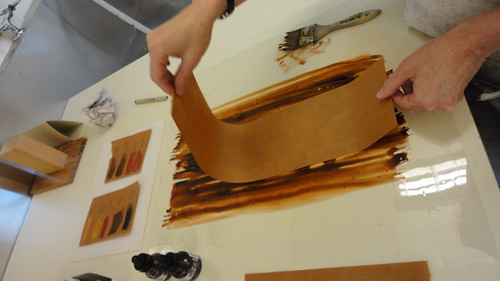
I hold my paper at the top and bottom (vertically) and dip it into the ink, in a sort of rolling motion, dropping one side down into the ink and immediately raising it up as the next area dips into the ink. The porous nature of the dry paper allows for the ink to wick into it quickly with an even distribution and a variation in color, but without brush marks.

If the ink doesn’t absorb throughout the paper I re-dip into the remaining ink until the paper is thoroughly covered. Sometimes I must dab with the brush to get stubborn dry areas to take the ink.
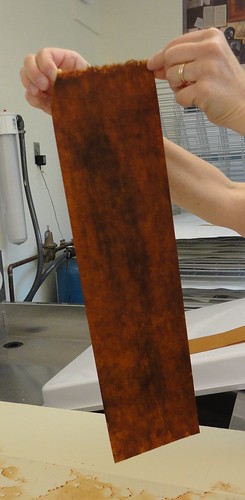
Once the paper is saturated, I hang the paper to dry, either with clothespins or occasionally taped onto the side of a workbench.
When dry, the paper can be further altered by direct applications of ink or with Prismacolor Premier art markers. (The art markers are another Etherington trick passed along to me by conservator Eric Alstrom.) The art markers allow for very specific marks, such as a few irregular spots. The ink can be sprayed over the dry paper using a brush (or toothbrush) to create a sprinkled leather look.
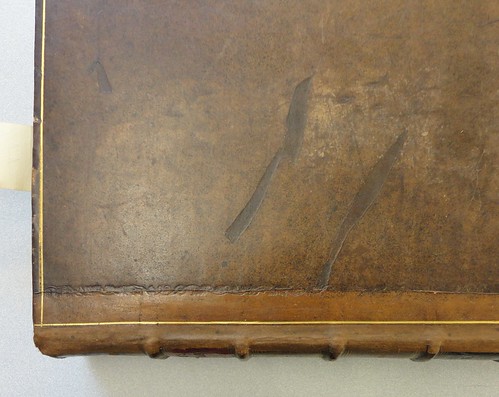
After the paper is dry, it is ready to use in these repairs, such as the finished one pictured here. Many conservators make further color and blending adjustments after the tissue’s application to the book, but I prefer to do my coloring off the book. My approach for toning paper is loose and somewhat serendipitous, much like the variations in the leather on the volumes themselves, but the method seems to work when used for these repairs.
Written by Stephanie Wolff
What "dye" is being used for this process?
ReplyDeleteWe are using FW Acrylic Inks to color the tissue. You can read more about them here: http://www.daler-rowney.com/content/fw-artists-inks
DeleteStephanie
Maybe do you know, how to dye thinner japanese tissue, e.g. 11-15 gsm?
ReplyDeleteI have had success with the method I describe here using paper as thin as 26 gsm. I know others color papers (and thin paper) by using a bath of dye and immersing their paper in that, then hanging to dry. Tatiana Ginsberg gave a workshop on dyeing Japanese paper at the Guild of Book Workers New York chapter. You can read about it at the following link. Hope it helps you.
Deletehttp://www.gbwny.org/news/2008/10/tatiana-ginsberg-kusakizome-gami-the-tradition-of-japanese-naturally-dyed-papers-2/
The best way I have found to dye thin paper is to immerse it in a bath of the dyed solution and hang to dry or lie flat onto blotter. I know other people have air brushed thin paper of you have access to and air brush.
ReplyDelete